Want to buy or sell something? Check the classifieds
  • The Fedora Lounge is supported in part by commission earning affiliate links sitewide. Please support us by using them. You may learn more here.

Tackling the block... and flange

Messages
15,083
Location
Buffalo, NY
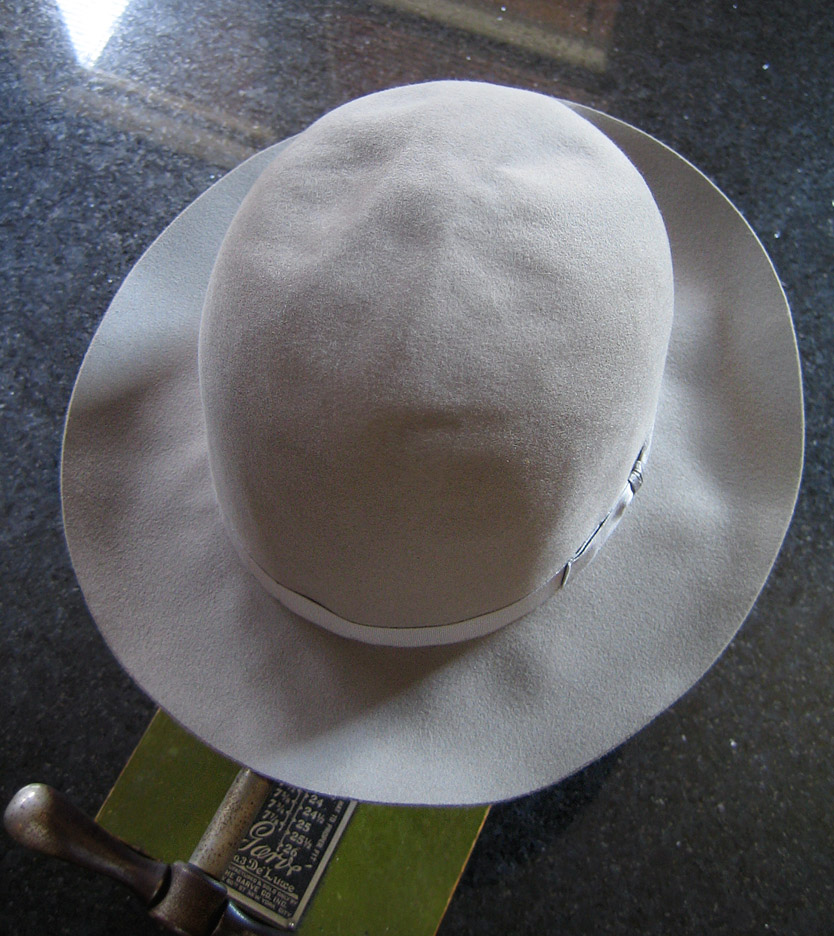
My recently purchased Borsalino pocket hat arrive with a generous amount of lumps and bumps from almost 60 years in a box.
pocket9.jpg


Normally I use the Garvé hat stretcher to steam, block and size my hats. This particular hat is very soft and light. Any ridge on the inside of the hat will telescope through with pressure. The rear sweatband seam is turned and sewn (both the visible fabric and the inner moisture barrier - with the bow added, there is a good amount of thickness there that showed immediately when the Garvé handle was turned.

I decided to work with a block and flange.

flange1.jpg


This is a size 7 1/8 flange and size 7 block. My head runs somewhere between the two. A nice thing about using the 7 block, is that it can fit inside a slightly larger hat with the sweatband inverted and it provides full support around the crown, without the voids on the sides where the Garvé is open. Here with the block inserted, during steaming:
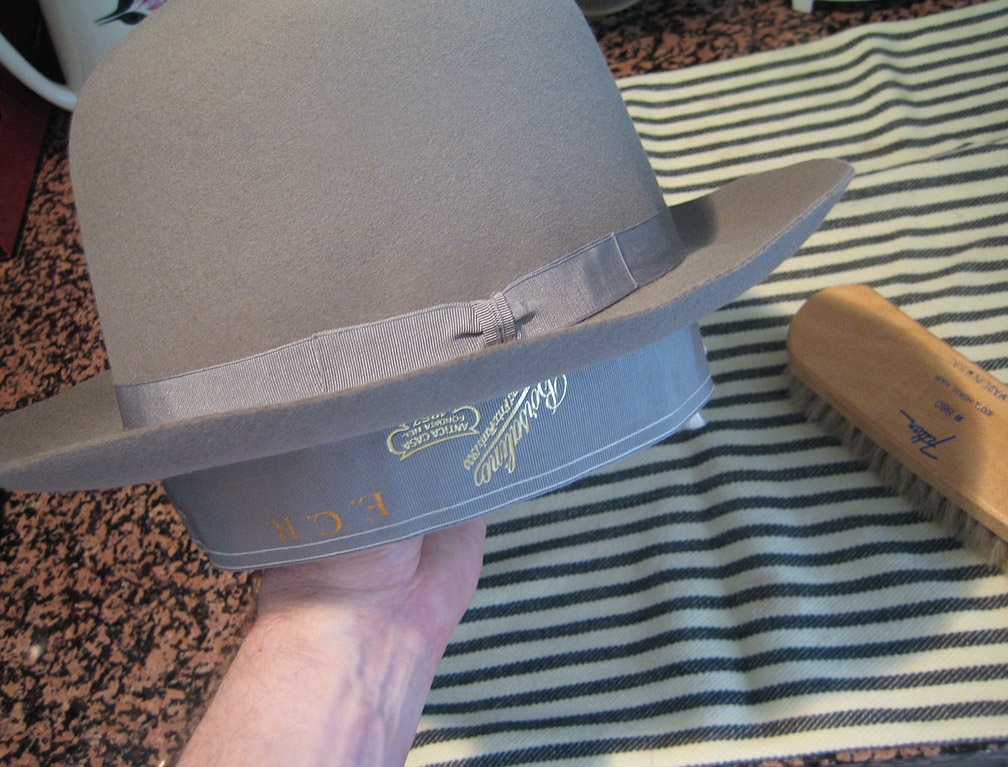
flange5.jpg


The fabric sweatband flipped out safely and easily. But note, this is always a concern on vintage hats... especially unreeded Borsos, which I find have a tendency to pop stitches when stressed. I also learned that it is easier to insert the block than it is to remove it... so watch a tight fit!

I used the both sides of the brush to smooth the felt. The wood handle works well to burnish the wrinkles, the bristles lift and fluff the fibers. With the paper liner protector, I handled the top of the crown very gently. Once the crown was smooth, I went to work on the brim. I haven't found or made a stand for the flange, so I used 4 water tumblers.

flange2.jpg


Just steaming the brim and smoothing over the flange makes quite an improvement.

flange3.jpg


My family has not yet allowed me to install a sandbag flange weight in the kitchen, so I tried an alternative. We have a couple of "memory foam" Tempur-Pedic pillows that I thought might work... they weigh a ton and conform to shapes almost like a bean bag.

flange4.jpg


In the end, I found a light pass with a steam iron (with several layers of cotton cloth protecting the feltworked the best.

flange7.jpg


flange8.jpg


flange9.jpg


flange6.jpg
 
Last edited:
Messages
15,083
Location
Buffalo, NY
Here are the results after creasing. I used a simple center dent and side pinches, the type of crease that one can do in a minute after unrolling the hat from a trip.

flange11.jpg


pocket14.jpg
 

Hoss & da Posse

One of the Regulars
Messages
212
Location
Shiloh Acres Farm, Ball Ground, GA
Quite the impressive transformation! Although I am probably still more gentle with my felt hats than is required; I find that they will take and respond nicely to more aggressive methods than I usually attempt. Thanks for the tutorial as I have a very thin Schoble that needs some work similar to this. I will be curious to know if you find some of the old wrinkles reappear after a period of time
 
Messages
15,083
Location
Buffalo, NY
Thanks... It was a fun diversion from more "pressing" responsibilities!

Thanks Hoss, I expect to make new wrinkles in traveling with this hat. A little continuing maintenance will likely be necessary (as it is on most felt hats.) I find that I enjoy some imperfection - especially in my earlier hats. Maybe if I had purchased them new in the thirties or forties, I would not feel the same way. Or perhaps I am just coming to accept that everything wrinkles over time, and a few wrinkles in the hat makes my wrinkles less noticeable?

:)
 
Last edited:

Aureliano

I'll Lock Up
Messages
4,753
Location
Macondo.
Beautiful sequence, Alan. I also don't have a sandbag press but I learned something from my friend at W&W. Your flange should have an indentation near the flat side going all around. You slightly wet a fairly long cloth (Just as you have it in one of your pictures --I use a piece of an old cotton, white t-shirt--) and put it over the brim. Make sure it covers the flange fully. Then using cord, you tight the whole shebang. The cord goes in the indentation. Then you pull the cloth until is nice and tight, leave it for a couple of minutes and voila. There is a special knot "the hatter's knot" that you use to tight the cord. I haven't learned it yet. Have to see Major Moore for that. Hope this makes sense.
 
Last edited:
Messages
15,083
Location
Buffalo, NY
Thanks Ale...that makes perfect sense. And yes, there is the indentation around the outside edge of the flange. I can give my wife back the pillows now!
 
Messages
10,939
Location
My mother's basement
Indentation! that's the word I needed!

Or a person might even call it a groove.

Nice work, Alan.

Blocking and flanging hats can be likened to ironing shirts. It sharpens 'em up, takes out the wrinkles, makes 'em look crisp again, etc. And, like ironing shirts, it's easy enough to understand how it's done, but there are still little tricks to it that a person picks up with experience. And, like ironing shirts, you can do real, permanent damage if you get unlucky or unthinking about it. Please don't ask how I know this.
 
Last edited:

bond

My Mail is Forwarded Here
Messages
3,535
Location
Third coast
Good job alan ,thanks for the demonstration. That s a sweet little rollable you have there too.
 

randooch

I'll Lock Up
Messages
4,869
Location
Ukiah, California
Great reference series there, Alan. I often wonder how one would go about removing the hat from a block if it's a snug fit. I think you answered my question: the block used should be slightly smaller than the hat being refreshed. So, as I'm a 7 1/2, I should look for a 7 3/8 block?
 

DNO

One Too Many
Messages
1,815
Location
Toronto, Canada
Thanks for the photo series, Alan. Really interesting to see the flange in action. Like you, I usually use my hat stretcher to reblock a hat...it is similar to your Garve...but I've had my eye open for a proper block and flange. I'll find one around here eventually.
 
Messages
15,083
Location
Buffalo, NY
Thanks very much!

Randall, I think to use a block in the way that I have, which, as Tony B. expresses very well, is more like an ironing board than as a sizing/forming tool... a size smaller than your hat size will work and also allow insertion with the sweatband attached. I could easily get in over my head in the ocean of hat knowledge, but I believe in a hat shop, reblocking with a correctly sized block would be done with the sweatband and liner removed from the hat.

It would be relatively straghtforward if the sweatband presented a cylindrical shape, but it is actually conic - tapering in as it heads up toward the crown. Pulling out the block reminded me of getting my finger out of the "Chinese handcuffs" we played with as kids. Removing the block exerts more force on the sweatband than inserting it... hence a suggestion towards caution when trying this at home.
 

Chepstow

I'll Lock Up
Messages
5,406
Location
Germany/ Remscheid
Alan, your Photo serie is very impressive. Your fine work on this Borsalino, much more impressive.
You show us, the work with your flange, the results of your shaping. The results work, is outstanding, perfect is the right word.
Thanks for sharing the Photos.
 

DRB

One Too Many
Messages
1,621
Location
Florida
Alan, great job! You made the right choice to use a block and flange. That hat stretcher would surely pop some stitches on a thin vintage borso.

A newly made block and flange set costs around $500.00. Ebay has used ones that occasionally are worth something.

There is a tool for removing the hat from the block but I cannot remember what it is called.

I REALLY like that Borso! How did you come across that one?

Edit: Sorry, I see in another post that you got it fishing the bay, you lucky guy.
 
Last edited:

Forum statistics

Threads
109,278
Messages
3,077,748
Members
54,221
Latest member
magyara
Top