Want to buy or sell something? Check the classifieds
  • The Fedora Lounge is supported in part by commission earning affiliate links sitewide. Please support us by using them. You may learn more here.

The Conversion Corral

TheDane

Call Me a Cab
Messages
2,670
Location
Copenhagen, Denmark
Ole, VERY good explanation!!!! I will have to steal this picture from you when explaining flanging as well. :D

Thank you, but no you won't. If you can use it, then please do. If only the grandkids were so easy to satisfy! *<|;o) ... Ho-Ho-Ho.


The bound edge of the flanged rim, I can imagine, also aides in creating the snap-brim.

Absolutely! My own findings make me very cautious, not to flat-iron a bound brim, when renovating a hat. Instead I iron it on a flange. If you iron the brim flat, you also stretch the ribbon, but it won't always crimp again, when you flange the brim. That can (partly) destroy the brim's ability to snap properly.
 

T Jones

I'll Lock Up
Messages
6,800
Location
Central Ohio
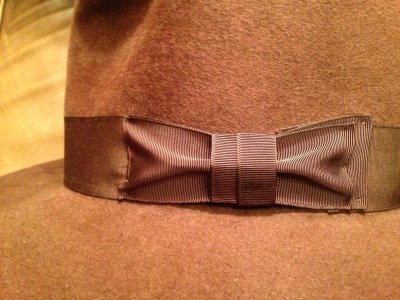
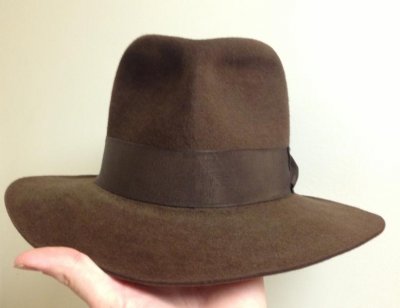
Another deadline has come and gone. Still no Indy! Anyway, John Galt sent me a few pics on the Indy bow work. Looks darn good! All he lacks now is the cutting for the dimensional brim and flanging it for the fedora curl...

pu5l.jpg


Indy 01.jpg

Indy 02.jpg

Indy 03.jpg

Indy 04.jpg

Indy 05.jpg
 

bond

My Mail is Forwarded Here
Messages
3,535
Location
Third coast
Interesting bow on that one, looks like there's a dogs milk bone stuck inside of it. Very 3-d looking
 
Last edited:

TheDane

Call Me a Cab
Messages
2,670
Location
Copenhagen, Denmark
Interesting bow on that one, looks like there's a dogs milk bone stuck inside of it. Very 3-d looking

Yes, it's a nice alternative "pleating" you see from time to time. Normally it's more flat in the ends, though. I haven't seen it with the "boney" dents in the ends before :)
 

T Jones

I'll Lock Up
Messages
6,800
Location
Central Ohio
It looks really close to the original bow work on the ROTLA Indy fedora except with an added flair. It stands out nicely. Now all he has to do is FINISH the hat! ;) It was originally a 4X Resistol Stagecaoch. Quality wise, this will be one tough hat and better than a lot of the other Indys out there. It started from good felt and the workmanship looks really top notch. I can't wait to get it! Come John G., FINISH MY HAT! ;)
 

John Galt

Vendor
Messages
2,080
Location
Chico
Been crazy busy at work. Will pick this up again tonight.

The bow was intended to be really 3D to track the original ROTLA Indy bow. I still can't post photos with Tapatalk Pro. Maybe you could post the ones you send me TJ?


"Faint hat never won fair lady."
 

John Galt

Vendor
Messages
2,080
Location
Chico
4a3uhadu.jpg


5avebuga.jpg


Anyway, I wanted to really pop the puffy look. I guess I didn't quite nail the original bow as well as I had wanted, but then again, I don't think Terry would have been happy with the following, because it doesn't look like the other photos, which show the 3D effect of the Flying V. I guess mine is a little more a "Flying Y," but I like it & so does Terry, so that's a win...

a6ezu5ut.jpg


"Faint hat never won fair lady."
 

Landman

One Too Many
Messages
1,751
Location
San Antonio, TX
John, I think you did a great job of recreating the original bow. I never realized the bow on the original looked like that until you posted those closeup pictures of it.
 

T Jones

I'll Lock Up
Messages
6,800
Location
Central Ohio
John, I think you did a great job of recreating the original bow. I never realized the bow on the original looked like that until you posted those closeup pictures of it.
Agreed! It looks really close to the original, with an added unique flair. I checked out the bow work on Penman's Raiders hats and I think John Galt nailed it closer than Penman did. (...not knocking Penman's work so don't anyone get offended! ;) In fact, if I was able to afford it, I'd buy a Penman)! J.G. did a real nice job on it. I can't wait to get it!
 
Last edited:

Joshbru3

I'll Lock Up
Messages
4,409
Location
Chicago, IL
The final conversion of this hat body.......a Winchester hat body

Well, this one has been an unfinished project for a while. With all the horrible weather in Chicago the last 5-6 days or so, I pretty much just stayed in my house and didn't leave. With all that time on my hands, I decided to finish this project once and for all.

This hat started its life as a hat that I made at Fedorafest a couple years back at Buckaroo Hatters. Bill, Robert, and I were allowed to make our own hats and it was a wonderful experience. The hat body I chose was 100% RABBIT and at Mikes shop, I sanded this body down to about 1/2 its weight initially. The body wasn't a western body, but it was a thicker weight dress body that I wanted to make much lighter.


Here's what I made at Fedorafest a couple years back......


It was a 3 inch brim with a 1/4 inch curl and a 6 inch open crown. The block was a bit rounder than I liked, but I wore it this way for a while.


About a year later, I converted the hat into a 30's Style fedora with a high rear brim flange. I kept the ribbon and the crown shape, but the crown had tapered and I found that I never really wore the hat. The brim was cut to 2 1/4 inches and the crown had rounded out to 5 3/4.


Fast forward 4 months after those pics were taken, I decided I wanted something else out of the hat. I took the hat apart completely. I sanded about 1/4 more weight off the hat body and made it into a lightweight felt. The finish is velvety and buttery and smooth as glass. I blocked the hat out to 5 7/8 with one block and then took a second block and just blocked the top down flatter which yielded a total crown height of 5 5/8 - 5 3/4 SQUARED/FLAT top. The brim had to be used for this extra crown material, so I was left with a total brim width of 2 inches.

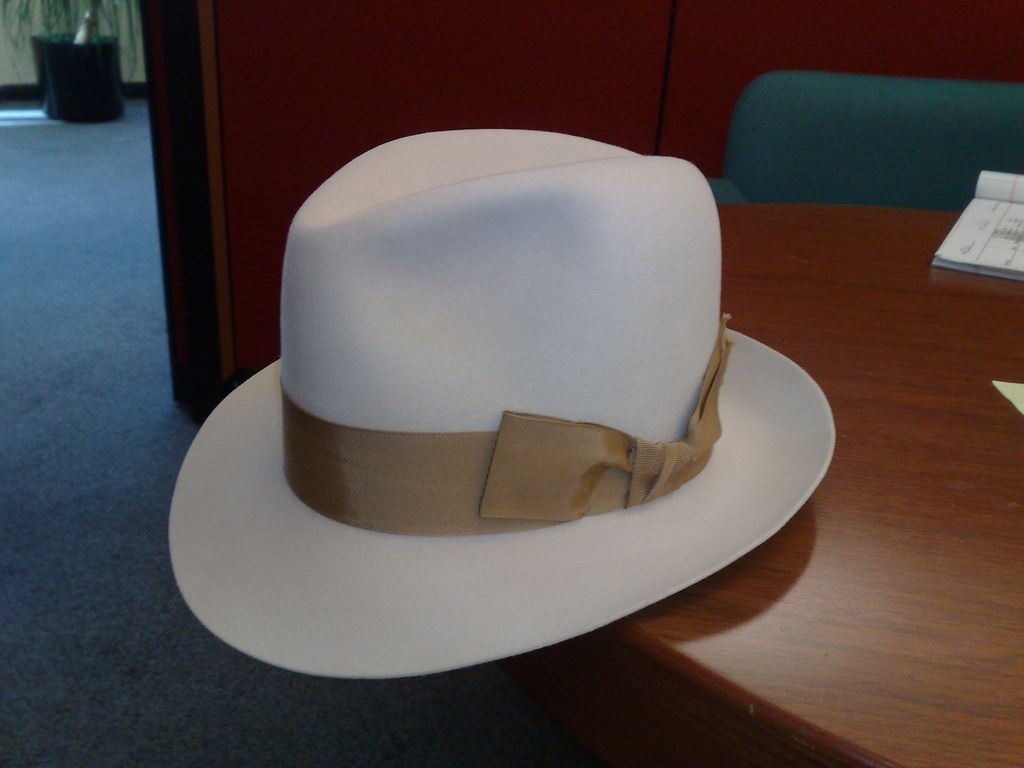
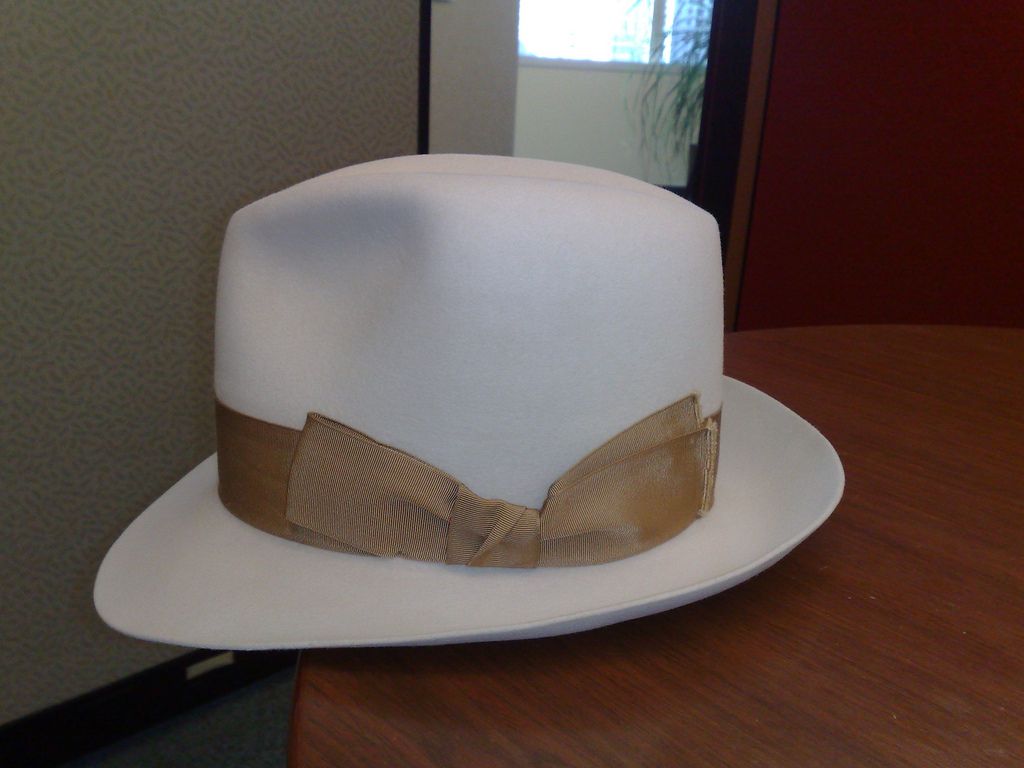
I then took a 1950's Borsalino brown ribbon, washed it with soap, ironed it, and attached it to the hat. I also used the 50's Borso bow, but I frayed one of the edges to give the hat a 1930's feel. The sweatband was one of my favorite parts. I bought a really high quality leather sweatband from a distributor, rubbed the leather with mink oil to darken it, punched vent holes every 1/4 inch, taped the rear seam, put a vintage brown sweatband bow on, and used a vintage wind trolley for lacing up the rear sweatband seam. The sweatband was a TON of work, but it really give it that vintage feel.

Here it is...........


John Galt

Vendor
Messages
2,080
Location
Chico
Looks great! What grits did you use in pouncing, and will you share your sandpaper source? PM is ok...


"Faint hat never won fair lady."
 

Joshbru3

I'll Lock Up
Messages
4,409
Location
Chicago, IL
Looks great! What grits did you use in pouncing, and will you share your sandpaper source? PM is ok...


"Faint hat never won fair lady."

Thanks John! I used 100 grit, then 220, then 400, then 600. When I pounce, I always go in counter clockwise direction and ALWAYS check to see if I am going too hard or soft. With darker colors, light and dark spots are very easy to get, so I sand until the felt feels and looks good and to my liking. The 100 grit does MOST of the cutting and the 220 just finishes the job. The 400 and 600 are simply used for finishing and that velvet feel.

I use 3M Pro Grade paper and always use my hand as a backing, never an electric sander.

http://www.homedepot.com/p/3M-9-in-x-11-in-Pro-Grade-220-Grit-Very-Fine-No-Slip-Grip-Advanced-Sandpaper-3-Pack-25220P-G/203311868#
 

T Jones

I'll Lock Up
Messages
6,800
Location
Central Ohio
Nice work Josh! So that's the sandpaper you need you need for pouncing. Easy enough to get anywhere. I use all those grits for finishing and sanding a lot of surfaces, drywall, paint prep, wood work...I thought it would have been a specialized millinery sand paper.
 

Joshbru3

I'll Lock Up
Messages
4,409
Location
Chicago, IL
Beautiful work, Josh! You never disappoint!!

Wonderful hat and a great work as ever Josh! I like the new ribbon much more as the first one!

Nice work Josh! So that's the sandpaper you need you need for pouncing. Easy enough to get anywhere. I use all those grits for finishing and sanding a lot of surfaces, drywall, paint prep, wood work...I thought it would have been a specialized millinery sand paper.

Thanks so much, Gentlemen!!

T Jones, from my experience, sandpaper is sandpaper. Obviously, there are different kinds for different uses, but I have found that a general sandpaper is just fine for pouncing. The 3M Pro stuff has always worked great for me and I have gotten a ton uses out of it. I have tried automotive sandpaper, and other kinds with basically the same results. The trick with pouncing is knowing when to stop and knowing when to switch grits. Its truly all in the feel of the hatter, not so much in the paper itself.
 

Lotsahats

One Too Many
Messages
1,370
Amazing work, Josh! That sweat is impressive--the stitching alone is just amazing. Do you have a vintage sewing machine?

A
 

Forum statistics

Threads
109,669
Messages
3,086,342
Members
54,480
Latest member
PISoftware
Top