Want to buy or sell something? Check the classifieds
  • The Fedora Lounge is supported in part by commission earning affiliate links sitewide. Please support us by using them. You may learn more here.

Still Looking for Cuffs and Waist for G-1 Jacket.

Dumpster Diver

Practically Family
Messages
952
Location
Ontario
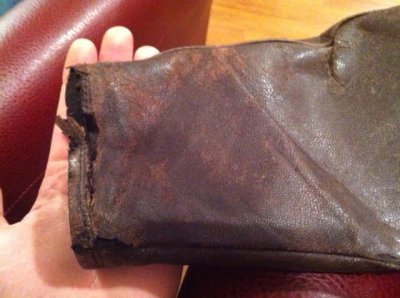
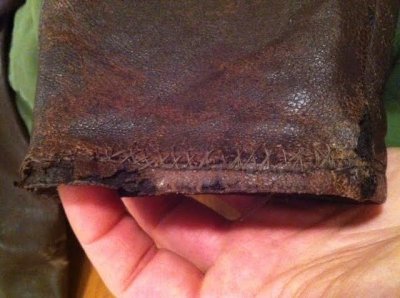
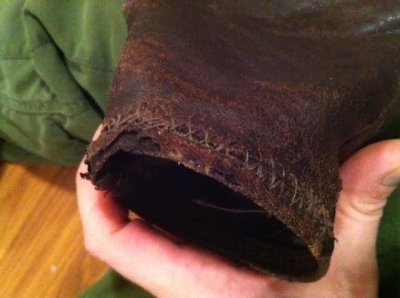
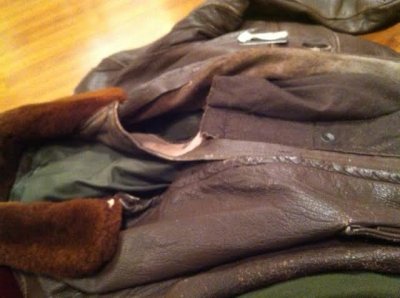
Just thought I would ask if any of you have a spare set of cuffs and-or-waist for a G-1 Jacket, I dont care if they are Pretty ratty or full of holes and moths have eaten them up a little, Just as long as they are real-deal Oldschool.

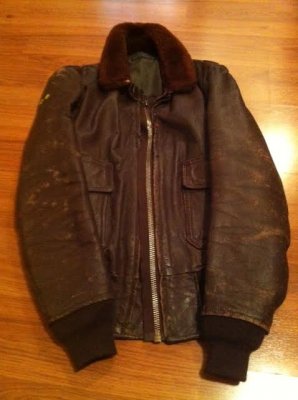
My G-1 is not in great shape, but been my Lucky Jacket, and made by STAR SPORTSWEAR and I havent been able to wear it, since I went ahead and gutted the Knits and Zip. (which were poor replacements from the 70s off what I believe must have been a snowmobile Jacket of some kind.)

maybe you had a Jacket you decided to replace and kept the originals as a spare set for a rainy day...

I duno, figure it wouldnt hurt to ask again.

-Jules
 

Dumpster Diver

Practically Family
Messages
952
Location
Ontario
If not you personally, maybe theres a place you know to get some (besides Ebay) that I dont know of you could kindly tell me about.
 

Dumpster Diver

Practically Family
Messages
952
Location
Ontario
Expensive, woah youre not kidding.

I could buy another Jacket at those kinds of prices, oh well. Ebay it is then.

Thought I would ask you guys Just in case.

http://www.ebay.com/itm/Rare-Rib-Ra...671?pt=LH_DefaultDomain_0&hash=item2c7259e7b7

This is what Im probly going for, seller will do 10 Dollar international shipping without going USPS priority if I read correct.

I like the Rib-style ones for mine better.
 
Last edited:

mihai

A-List Customer
Messages
339
Location
Europe
@Dumpster Diver

Those look pretty good. I bought 2 pairs of these for replacement, they are on the way. One of my 60s vintage jackets has that model of knits with the horizontal ribs. I have 2 G1 jackets from late 50s and early 60s that need getting cuffs, waistbands replaced.
I do not like the Jap ones, they look too...over-made.
 

Dumpster Diver

Practically Family
Messages
952
Location
Ontario
I think if Im not mistaken, you will come across a lot of G-1 Jackets with Cuffs and waist Removed, Im not exactly sure, but I theorized the military did this when De-commisioning them to place in long term Storage crates or whatever..the intention might have been to deter Moths and Mice from making themselves at home in the wool Cuffs. But I might be mistaken, or that might only be partially why this was done.
 

pauleway

Practically Family
Messages
655
Location
Western NY
Quite a few years ago I sent my G-1 to US Wings for cuff and waistband replacements, and I was very pleased with them. I am not a fanatic on exact replica type things and think their knits were very nice.
 

mihai

A-List Customer
Messages
339
Location
Europe
Quite a few years ago I sent my G-1 to US Wings for cuff and waistband replacements, and I was very pleased with them. I am not a fanatic on exact replica type things and think their knits were very nice.

I wonder how do the various workshops perform the cuff replacement. This is because the exact reproduction of the cuff stitching is kind of difficult.

I checked the 2 rows of stitching of the G-1 jacket knitts (upper one that is visible and lower one that is hidden somehow). I think that there is no way the lower stitching can be exactly recreated by sewing machine without undoing the shoulder seam stitching and the sleeve vertical stitching that runs from shoulder to cuff. First the lower stitching is made with sleeve leather, liner unfolded and turned inside out, with cuff in the middle. Then the leather is turned on one side, lining the other side and the second upper visible stitching is made.
For the torso also, same story, the side seams should be undone for the lower stitching to be properly redone.

Once a leather stitching is undone, it is difficult to put it back because the machine has to be adjusted at the same step / follow the exact direction to reuse the existing punches.
 
Last edited:

Dumpster Diver

Practically Family
Messages
952
Location
Ontario
I just sew them in by hand, time consuming yes, but I can simply follow the original stitch holes that way, Using a machine for a re-tread is bogus on the hide man!
 

mihai

A-List Customer
Messages
339
Location
Europe
I just sew them in by hand, time consuming yes, but I can simply follow the original stitch holes that way, Using a machine for a re-tread is bogus on the hide man!

How much time did it take you per cuff? How about for waist band?

I intend to do the same thing. Being in continental Europe, there are not workshops that offer that specialized services like in UK / US. I went once with a jacket to get a stitching at the sleeve and I ended up with a crappy one not even straight. So no more experts. I will stitch it by myself, for 2-3 jackets I can afford the time. This way I'll be able to preserve the outer thread of each of the 2 stitches.
 

commodorekorns

New in Town
Messages
14
Location
Virginia
I have a pair of extra M422A cuffs from Gary Eastman / Eastman Leather, brand new that I have never used. Not sure if those are close enough for you but if you are interested let me know/send me a PM.

Thanks Marc
 

Dumpster Diver

Practically Family
Messages
952
Location
Ontario
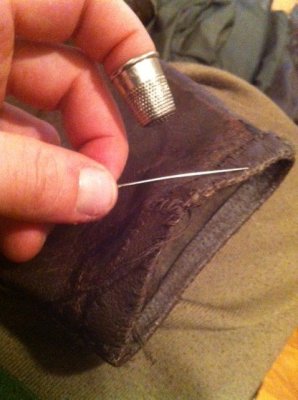
Sewing cuffs and waist is fairly straightforward, get started by tacking them in with a few pins tucked carefully, making sure you have secured the liner well. takes time to balance the liner fabric and Shell between the Cuff when sewing away.. but is worth taking the most time to do to have it looking right (Use carefully Placed tacking pins) Theres a fine balance between sewing Fast, and when to slow down to acheive the right stitching consistancy.

Just follow the original holes and that way you dont put new holes in the leather, and it will make for easy sewing!

If you desire the Machine style stitch it will take a lot longer because you have to go back one hole each pass with the needle, I dont bother because I think one pass is enough to tack them on strong enough as long as Im using proper thread. It doesnt matter how long it takes but I estimate a couple of hours maybe, I Just put on a movie or some music to pass Time. Expect to spend an hour on the zipper more or less too.

You could probly consult a local Taylor, and explain how you want it done and they will be happy to oblidge Im sure.

of course the price will not be worth the satisfaction of knowing you did the Job yourself.
 

Dumpster Diver

Practically Family
Messages
952
Location
Ontario
2.jpg 11.jpg

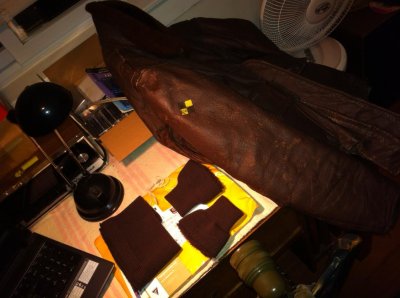
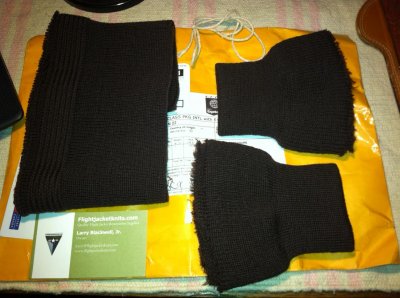
these Came From Larry@ www.flightjacketknits.com

These are absolutely incredible knits, Im Very pleased as Larry said I would be, Very Good price considering you cant Just walk into a store and buy them off the shelf. I gotta plug his Site here, because hes definetly helped me out and was very honest and nice..pleasure to do business with.

Im currently In the process of installing them, Very rigorous, taking more time than I remember but Im doing it very carefully taking my sweet time hand-bombing them in with some nice silk Thread that was special order from a wool shop.

More pics soon.

I have to re-install the YKK Replacement Zip because Its all I got for now, Its not bad..Had to be removed and re-installed because someone Always Just Machine sews them in and that can bring the whole sandwich stitch line out of skew. This zip was Rubbing against the inside seam of the leather and Totally scuffed it all up badly.

gotta ask if you guys know where a Fella can score a G-1 NOS zip. Dont know much about the original G-1 Style zips, if you care to enlighten me I would be much appreciate My Friends!
 

Dumpster Diver

Practically Family
Messages
952
Location
Ontario
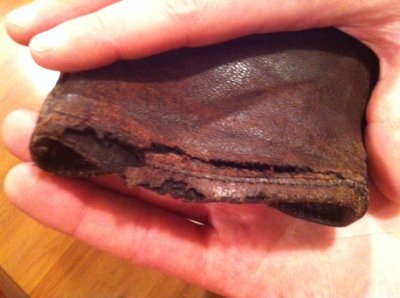
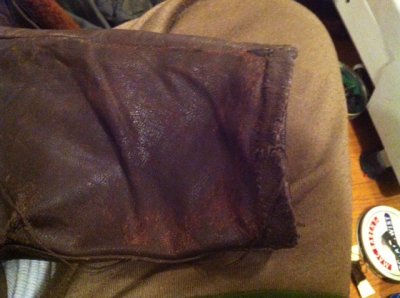
Fixing BLown Sleeve at the Cuff before Installing new Wool Knit.

3.jpg 6.jpg 19.jpg 21.jpg 7.jpg 9.jpg 10.jpg 12.jpg 13.jpg 15.jpg 16.jpg 17.jpg 22.jpg 23.jpg 25.jpg


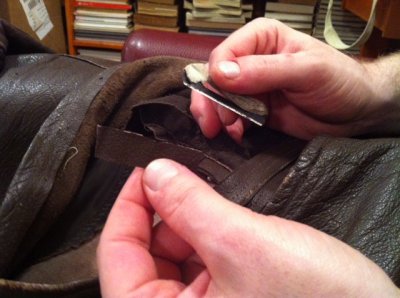
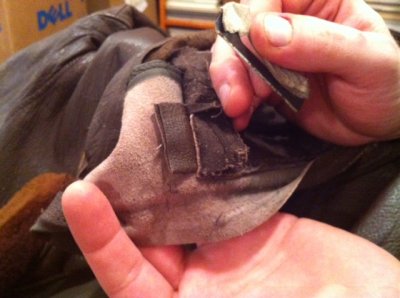
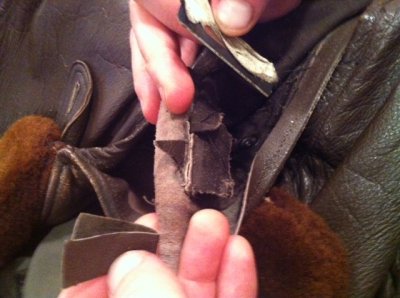
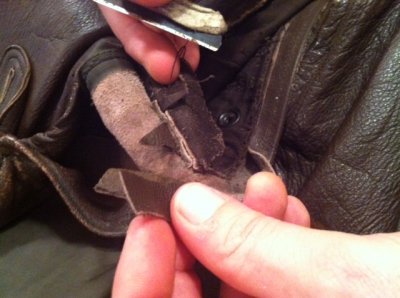
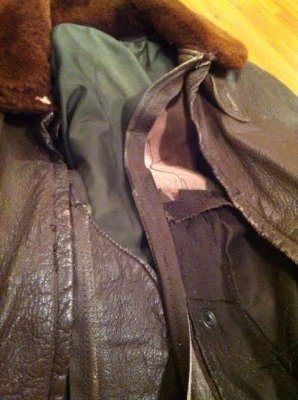
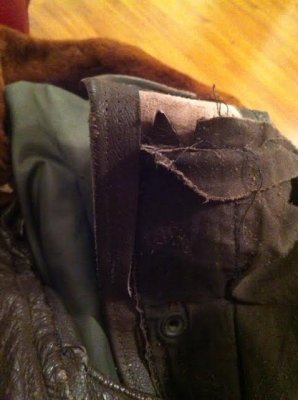
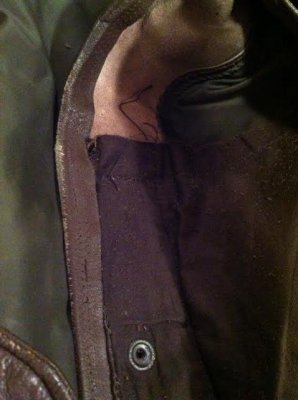
So, First order of Business, Finding a Splice of Leather for fixing the Blown Cuff. First I checked inside the Zipper seam, the map pocket inside, Then Notice a 3 ply splice off the join at the top of the Map pocket, If I cut it Just right it wont affect the Jacket overall, and so here you can see my work removing the graft of hide to transplant it onto the Cuff.

Next I sew the Blown Seam, being very Light and Careful, Eyeing the correct placement of the Patch to the cuff, Once this has been done I apply Rubber cement to the Cuff and patch and Press them together giving a few minutes to Let dry. Then Stitch them up.

Looks alright and re-enforeces the Seam of the cuff well enough to plug in and Anchor a new Wool Knit.

More pics Soon, Everything In good time. :cool:
 
Last edited:

Dumpster Diver

Practically Family
Messages
952
Location
Ontario
PS. wondering how I can Change the Title of this Thread (If possible) to *Repairing a G-1 FLight Jacket* To maybe help others who need some tips and Tricks on their own DIY Resto Projects, After googling *installing Cuffs and Waist on G-1 Jacket* all I get is;

STEP-1-find a replacment parts

STEP-2-go to the Tailor and pay someone else to do it for you

Like, Thats not very Helpful exactly...you know...like Thanks, I didnt know that.

this is to go a little bit further than that and actually Try to offer Confidence building for those who are new to this and have only the passion.

Im always Learning, always improving my skills, I believe in other people who need help in ways where normal thinking is not enough and Craftiness and Inginuity and know how are more defined and specific, theres so many poor Repair Jobs out there its appauling.

I dont blame individuals for these erronious repairs, Military flight Jackets are not Common knowledge.

We need a guidline template and sets of available DOs and DONTS, for those attemting this type of work on their own. Sewing is an ancient Skill and There is much to know and these skills need to be within your own potential To unlock.


I need Specifications and Step By Step procedures and Techniques and DIY details...most people looking for a helping hand tend to overlook the one at the end of their own arms.

again, maybe this will help people on their own DIY Flight Jacket journey, my goal is to Share knowledge and Trade Secrets.
 

mihai

A-List Customer
Messages
339
Location
Europe
Nice job replacing the missing leather part. Thanks for taking time to expose all the steps.

I purchased also the knits from http://www.flightjacketknits.com . Indeed v nice quality at a fair price.

I live in the continental western Europe and here the vintage phenomena is quite obscure. There are some repair shops in my area but they do not look like that knowledgeable when it comes to such complex things. I also emailed twice to AERO asking for cuffs replacement, collar but I did not even get a reply (speaking about customer experience ;))
Given the situation I decided to replace them by myself, instead of getting my jacket butchered by some local professional. I already replaced the sleeve cuffs of one jacket, using manual stitching. I must say it's time consuming, if trying to do things right. At the sleeves there are 3 stitches (straight lockstitch type):
- first visible one on the outside attaches leather shell, cuff and liner (takes about 2 hrs to do it manually - lockstitch type)
- second attaches internally cuff to the liner (did not do it)
- third (lowest one) which is hidden attaches again the leather shell, cuff and liner - still to be done (more difficult could take longer than 2 hrs)
Also given that the cuff is 2 ply and in order to align it evenly with the sleeve, some temporary stitching (I used white thread) should be used on it.

I must mention that I had no previous sewing experience, perhaps for someone more experienced time would've been shorter. I was lazy and did not take pictures, perhaps at the next replacement I will. If you are interested let me know.
As you can see, this kind of operation is time consuming. I'd rather had this done by some professional workshop. Unfortunately this kind of business is not appealing for them.
 

Dumpster Diver

Practically Family
Messages
952
Location
Ontario
It took a lot longer than I remember to do the Cuffs right, this is a 2 day job, Its not something you want to do over, and the Liner always has to be right or it will bunch up too tight at the end, or Look too loose and messy. I dont mind skipping the extra stitch lines you mentioned, those can wait until the cuffs are Tacked in place with the liner...maybe another day. I had some trouble at the waist band because of my limited Skill set when it comes to sewing. I am no professional by any stretch of imagination. Hard to get the Wool knit waist band perfectly lined up all the way, make sure the edge doesnt Fray and come apart!!! or get too far out of skew with the liner and shell, or it will un-ravel at the seam, might be better to Do those Extra Stitch lines after all.

Next time I install a waist band, I will use more pins and the real problem was getting the liner frilled with every stitch to take up the extra slack, The machine obviously does a perfect Job, I dont mind if it looks a bit un-even by hand, no way to help it, I would up with a few bunched up spots but nothing so brutal Its gotta be re-done. better than nothing.

I also should have washed the liner by hand a little before doing all this.

Pics tommorow, Time for bed, happy new year everyone!

Waist is almost done, Zipper next, then washee...then finished.
 

Dumpster Diver

Practically Family
Messages
952
Location
Ontario
49.jpg 50.jpg 46.jpg 48.jpg 47.jpg

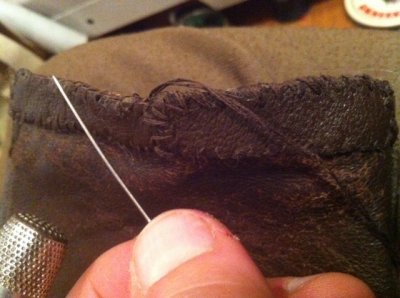
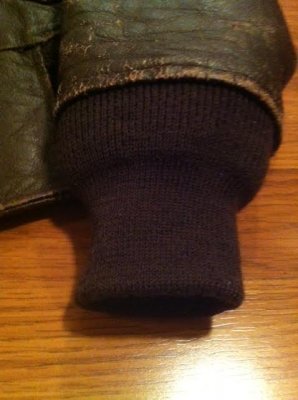
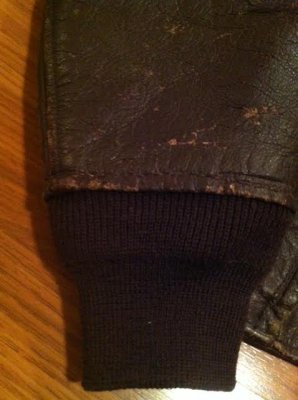
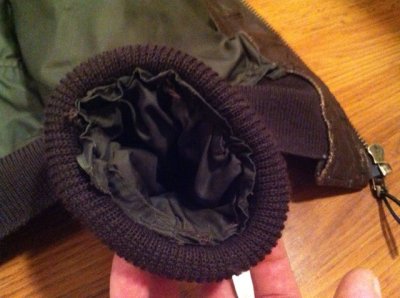
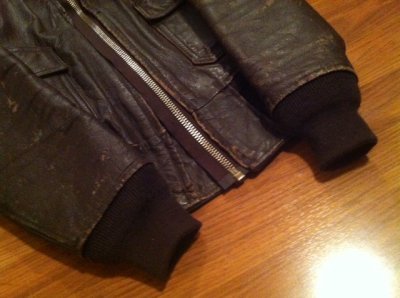
Here are the Cuffs tacked in best as I could do by hand, They should be ok for now. I think these are better quality than originals, Just corss my fingers the Dye doesn Run if they get soaked ever. A picture is worth a thousand words, I used Four pins to hold each cuff, Then Held them with index and middle Finger inside, then pressed my thumb on the outisde to give a little pleat on the inside, of course its not even at all. but you can make a real mess of the liner inside if youre not extra careful. Im happy. I followed the original stitch holes and that is the REAL TRICK, that you dont have to use a lot of tendon strength to push the needle, its a lot more brain than brawn to make it easy..sometimes a light just goes on once you warm up sewing and get in the zone and you click into the job.

The waist took time because Im left handed and started in the middle first, to the right then back and to the left. I had a lot more trouble on the left side keeping the waist straight, but its pretty good, I did have to tack the second stitch line on the left because the knit wasnt installed with enough slack to hold together when broken in after.

The trick is also to break in the stitches a little once the cuffs and waist are tacked in place too.

I think the pics here speak for themselves.
 

Forum statistics

Threads
109,303
Messages
3,078,313
Members
54,244
Latest member
seeldoger47
Top