Want to buy or sell something? Check the classifieds
  • The Fedora Lounge is supported in part by commission earning affiliate links sitewide. Please support us by using them. You may learn more here.

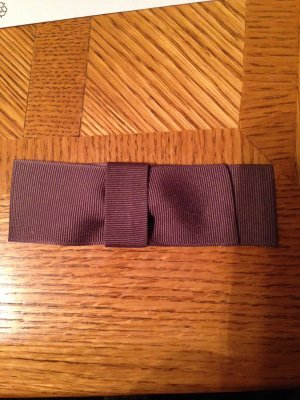
New "How to make a bow" TUTORIAL by FORTINO37

Fortino37

Familiar Face
Messages
76
Location
Mexicali
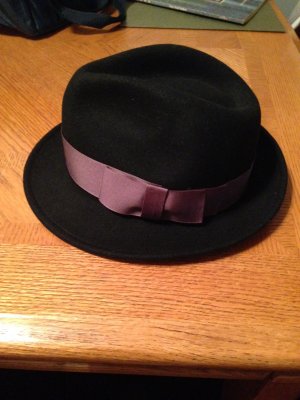
More than a year had pass since the last time a make a visit in the fedora lounge, a lot of water run under the bridge, but I am back, thanks to Ed Wiser that send me an email asking for a tutorial for "how to make a bow", I can't find the original photos and decide to make a new edition, so here it is.
Thank you for your interest and Thanks to Ed for bring me back.

1 2

3 4

5 6

7 8


10 photos is the limit please see Tutorial part II http://www.thefedoralounge.com/showthread.php?55653-quot-How-to-make-a-bow-quot-TUTORIAL-by-FORTINO37-PART-II
 
Last edited:

The Wiser Hatter

I'll Lock Up
Messages
4,765
Location
Louisville, Ky
I am glad you where able to make this for everyone to enjoy. Great work.
Will use this for a boater that I have that I want to make a few different color Hat ribbons for.
 
Last edited:

Killick

One of the Regulars
Messages
120
Location
Norwich
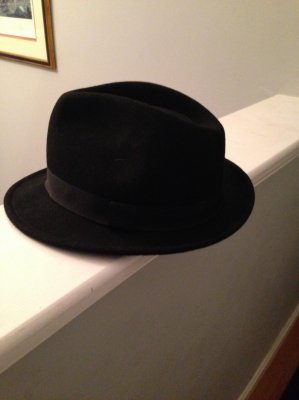
Thank you for the post. I made one! Have an inexpensive Blues Brother fedora which had just a plain small black ribbon. I figured I'd attempt replacing it. Didn't turn out to bad.
photo-6.jpg photo-7.jpg photo-5.jpg
 

John Galt

Vendor
Messages
2,080
Location
Chico
I like it. Now how do you attach it to the rest of the ribbon that goes around the hat? Any special way?

Take one apart. You will see that the bottom on one side is tacked down first, then the other, and then the top ends are pulled tight against the crown before being tacked down. This prevents a gap at the top end where the hat tapers. You will also note that a small fold is often put in the middle of the ribbon where it meets the bow, so the ribbon "dives" in where it meets the bow. This fold is hidden under the bow.

Hope this helps.


"Faint hat never won fair lady."
 

TheDane

Call Me a Cab
Messages
2,670
Location
Copenhagen, Denmark
It is also very important to iron/press the ribbon into a curve, so the outer-edge of the curve is longer than the inner-edge. The outer-edge will go along the brim, when the ribbon is sewn to the hat - and the curve will help to get the ribbon embrace the crown better. If you don't do like this, the top of the bribbon will not follow the tapering of the crown and lie tight against it.
 

Killick

One of the Regulars
Messages
120
Location
Norwich
Thanks for the compliment Tommy. It's a 10' hat lol. Kinda like a 10' paint job on a car. And thanks for the input on how to get the ribbon to lay down. Mine doesn't real well in some places for the reasons you guys stated. But it's an ok knock arounder.
 

John Galt

Vendor
Messages
2,080
Location
Chico
I didn't get photos of every step, but here's a conversion from a strat/OR to a fedora ribbon & bow.

bumubu3u.jpg


4u5e4a9y.jpg


u3e8e8yh.jpg


9eteryzy.jpg


a5a3epe9.jpg


5yqazesu.jpg


yvybahyt.jpg


I tacked the bottoms first as previously noted, then stretched the top to take up the slack on the taper, making sure to put a little crease in the middle so the ribbon "dives" into the bow. I used a mismatching thread, but will switch it out when I have the right stuff. The bow is straight out of the tutorial.

Oh, to prevent having to tweak the gap, it's best to make the bow first & fit the gap to it. Also, tacking and tying with individual stitches gives you the ability to tweak without starting all over.


"Faint hat never won fair lady."
 
Last edited:

John Galt

Vendor
Messages
2,080
Location
Chico
When I iron the ribbon, I use a spray bottle to dampen a protective paper towel sheath. This takes out the wrinkles while preventing heat marks on the ribbon. I do the same when I iron the loop for the bow, etc.


"Faint hat never won fair lady."
 
Last edited:

Forum statistics

Threads
109,253
Messages
3,077,325
Members
54,183
Latest member
UrbanGraveDave
Top