Want to buy or sell something? Check the classifieds
  • The Fedora Lounge is supported in part by commission earning affiliate links sitewide. Please support us by using them. You may learn more here.

The DIY Vintage Repair Before/After Thread

Atomic

One of the Regulars
Messages
118
Location
Washington
Thanks, PoohBang!
One size fits all. You plug it in and it starts getting hot. No switches or knobs! Probably another reason why it is still going, nothing really to breakdown or wear out.
 

martinsantos

Practically Family
Messages
595
Location
São Paulo, Brazil
Great thread.

I have posted this before in the radio's thread, but it is the very best restoration I ever made.

This is a Fairbanks Morse radio from 1935/36.

The way it was:

fmorse.jpg


Parts of wood were replaced by plastic (as the top). Several colors were aplied until it get the "rainbow colors". They put this because it appeared in a rock video clip. And they turned it on because the dial lights when filming. The power transformer heated to much, and almost carbonized. I had to get a new one, impossible to rewire the old one. My greatest trouble was to find the knobs. I had no clue about how the original would look, so I got those I think near the original shape.

There were some other little problems, like two burned tubes and with the speaker... But everything is OK now.

P1030145.jpg
 

BunnyLamarr

New in Town
Messages
23
Location
Blighty
Hey, I have a bunch of old projects and such that I've done that I could add in. Here is my breakfaster that I refinished and cleaned up. I wanted to clean it up, polish it, and be able to actually cook with it if I wanted to.

How it started:
221403154_o.jpg

221403210_o.jpg

221403327_o.jpg


Started off by taking the whole thing apart. I needed to get inside it and clean it up. Four long bolts hold the whole assembly together.
DSCN0770.jpg

DSCN0771.jpg

DSCN0772.jpg


I didn't take any pictures of the sanding and polishing, but thats all I did. I cleaned and polished for a few hours with sandpaper and steel wool. Since basically the whole assembly is aluminum there was a lot to go through, but it wasn't like polishing steel. Much easier! The ceramic heating plate on the top (the big white square) was cracked, but the wire running through it along with support from the body held it in place without any issues. I washed all of the pieces in the sink with dish soap to be able to place food on it, then started reassembling it.

Here it is after the work:
DSCN0778.jpg

DSCN0780.jpg

DSCN0779.jpg

DSCN0777.jpg


It works great! This little bugger gets hot in a hurry and stays hot. Its so simple and over built that I don't think it will ever die. Heck, its been around for 75 years already and still works like a champ. When was the last time you had a modern toaster that lasted 10 years?

This thread if fun, I'll probably post another thing or two as I find pictures and remember the projects.

oh my goodness, I have never seen anything like that; it's beautiful! You did a super job on it. I am off to Google, is it officially called a 'Breakfaster'?
 

Atomic

One of the Regulars
Messages
118
Location
Washington
oh my goodness, I have never seen anything like that; it's beautiful! You did a super job on it. I am off to Google, is it officially called a 'Breakfaster'?

Yes, it is called a Breakfaster by the Calkins Appliance Company. I find them on eBay from time to time, usually around 30 to 45 dollars after shipping. They are neat even just to keep around to look at!
 

Atomic

One of the Regulars
Messages
118
Location
Washington
Arvin Fan

I'm really diggin this DIY thread. I love it when people show the steps they took to fix cool stuff up. So, here is my next contribution, and I apologize for it being a long one but hopefully you enjoy it some.

I was poking around an antique shop and found this guy:
DSCN0798.jpg

DSCN0827.jpg


It didn't have a price tag and the owner plugged it in for me to see if it worked. Well, it turned on the fan with a bit of a battle cry, slowly building speed but not really getting anywhere. Then I kicked on the heater and the fan stopped moving and the heater came on an burned off at least 20 years of dust. Bit of a scary moment as I though I was going to burn the guys shop down with this thing. He shook his head and said "I'll sell it for 5 bucks, but I'm not responsible if your house burns down." Heck, for 5 bucks I took it just for the sake that it still looked cool just chilling in my garage.

Onward and upward, I started taking this thing apart since it was so filthy. I figured if nothing else I can clean the motor and see if that helps with the lag. The front grill was a bit banged up so I took it off first and showed it affection with a hammer.
DSCN0828.jpg


Removed the heating unit to get it clean and get underneath on the shroud.
DSCN0832.jpg

DSCN0831.jpg


Flipped it to start getting at the motor.
DSCN0835.jpg
 

Atomic

One of the Regulars
Messages
118
Location
Washington
Think there is a reason it was struggling to generate power?
DSCN0836.jpg

DSCN0838.jpg


The start of cleaning up the motor.
DSCN0846.jpg

DSCN0847.jpg


I forgot to take a pic of when I actually got the motor and coil cleaned. It was actually in really great shape and just needed to have all the old muck cleared out. You can see how shiny and bright the coil is inside the plastic, the whole unit actually was in decent shape. I cleaned the motor gear/wheel/block whatever you call it and put some bearing grease in to give it that clean motion and quiet it down a bit.
DSCN0850.jpg


I cleaned the metal pieces to get the dust and old grime off. I didn't go crazy with the scrubbing as this had a bunch of old paint spots on it that I actually really like. Gives is that studio/garage feel of something that has actually been used like it should have been. I really like the paint splatter on the blades.
DSCN0851.jpg


Reassembly. Always take lots of pics just so you can look back at how the thing went back together. I can never remember...
DSCN0852.jpg


And here she is, running like a top!
DSCN0853.jpg


Got the heater working with the fan, it comes on very quickly now and has plenty of power to run both. This thing is a lot quieter than I expected, its pretty silent. So far, my house hasn't burned down. The heater isn't all that hot, but as you can see the wires are glowing red so I can't expect much more from that. Just old technology.
 

AmateisGal

I'll Lock Up
Messages
6,126
Location
Nebraska
Great thread.

I have posted this before in the radio's thread, but it is the very best restoration I ever made.

This is a Fairbanks Morse radio from 1935/36.

The way it was:
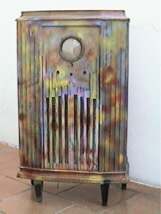
fmorse.jpg


Parts of wood were replaced by plastic (as the top). Several colors were aplied until it get the "rainbow colors". They put this because it appeared in a rock video clip. And they turned it on because the dial lights when filming. The power transformer heated to much, and almost carbonized. I had to get a new one, impossible to rewire the old one. My greatest trouble was to find the knobs. I had no clue about how the original would look, so I got those I think near the original shape.

There were some other little problems, like two burned tubes and with the speaker... But everything is OK now.
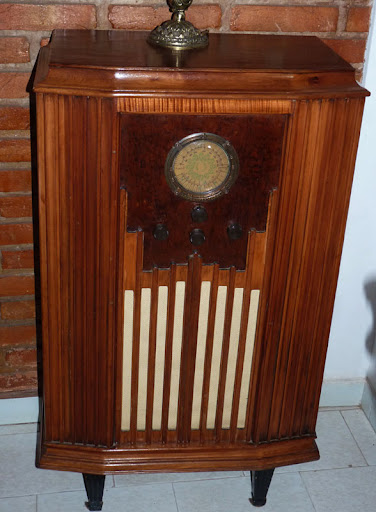
P1030145.jpg

WOW!!! Amazing job!
 

Lady Jessica

One of the Regulars
Messages
243
Location
Southern California
And here she is, running like a top!
DSCN0853.jpg


Got the heater working with the fan, it comes on very quickly now and has plenty of power to run both. This thing is a lot quieter than I expected, its pretty silent. So far, my house hasn't burned down. The heater isn't all that hot, but as you can see the wires are glowing red so I can't expect much more from that. Just old technology.

The fan is so cute! I love it! Good job, it looks much better at the end than at the beginning!
 

Land-O-LakesGal

Practically Family
Messages
864
Location
St Paul, Minnesota
OK this was our weekend project floor remodel at my husbands Barbershop. Sorry if there was a better thread to put this in but this seemed appropriate.

this was the floor before.
003-1.jpg


This is the finished floor.
010-1.jpg


And here it is with the furniture ready for buisness.
002-1.jpg
 
Last edited:

Mr_D.

A-List Customer
Messages
320
Location
North Ga.
OK this was our weekend project floor remodel at my husbands Barbershop. Sorry if there was a better thread to put this in but this seemed appropriate.

this was the floor before.
003-1.jpg


This is the finished floor.
010-1.jpg

Like the new floor but LOVE the old one. I love the way the brown blended with the rest of the room. JMO. great job though. :)
 

Miss Golightly

Call Me a Cab
Messages
2,312
Location
Dublin, Ireland
I'm so impressed with the work that everyone has done here - well done!

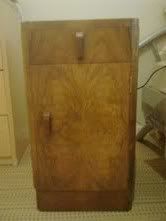
I was hoping some of you could give me some tips for some DIY - I have two 1930's bedside lockers that are in need of some TLC - they came with a dresser that is in perfect condition (the lockers clearly got a lot more use) and when they are all reunited again (the dresser is in my brother's house as we have no room for it at the moment) I would like them all to look their best and like they match!

The tops of the lockers show a lot of wear but the sides are in lovely condition - smooth and laquered I think. What do I need to do - sand them? Varnish them? Clear varnish or coloured varnish?! As you can see I am a complete novice when it comes to this kind of thing but it's something I would love to do. Any help would be of great assistance.

Here is one of the lockers:

Locker.jpg


And here is the top that seems to have a lot of water damage:

Top.jpg


Thank you!
 

kampkatz

Practically Family
Messages
715
Location
Central Pennsylvania
Miss G, here in the USA there is a wood refinishing kit called Homer Formsby that would provide all you need to restore those pieces. Perhaps Ireland has something similar. A kit would give you the step by step directions to produce a fine piece of furniture.
 

Miss Golightly

Call Me a Cab
Messages
2,312
Location
Dublin, Ireland
Miss G, here in the USA there is a wood refinishing kit called Homer Formsby that would provide all you need to restore those pieces. Perhaps Ireland has something similar. A kit would give you the step by step directions to produce a fine piece of furniture.

Thanks for that - I had a look online and it's called a Furniture Refinisher? I checked to see if the same brand is sold here but it isn't but I'm sure there has to be a similar product here. I'm not crazy about the idea of sanding or anything like that so something like this could be perfect - thanks again!
 

Forum statistics

Threads
109,269
Messages
3,077,650
Members
54,221
Latest member
magyara
Top