Want to buy or sell something? Check the classifieds
  • The Fedora Lounge is supported in part by commission earning affiliate links sitewide. Please support us by using them. You may learn more here.

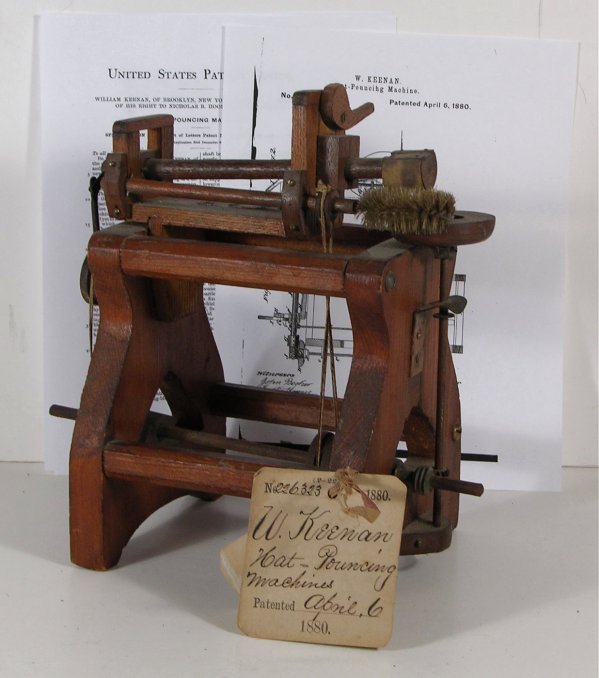
Photos of hatters tools

John Galt

Vendor
Messages
2,080
Location
Chico
JG, your DIY tools are awesome. I've been using your puller downer and runner downer on some projects. The steaming "kettle" is pretty smart. Nice ideas!


Sent from my iPad using Tapatalk

Thanks A&A! I'm glad they are working for you. I've spent all weekend working on my flange bag, and it's coming together. Couldn't get my sewing machines working, so I sewed the bag by hand with a stitch awl. I'll post pics in a bit. It seems to be working - it heats up the sandbag pretty well. Still need to make the canvas "keeper" cloth to hold it in the kettle.

I will need some sort of frame or handles - there's about 65 lbs of sand in the bag, and it's a pretty hefty lift to haul around.
 
Last edited:

John Galt

Vendor
Messages
2,080
Location
Chico
So I cut the bottom out of the oil pan, taped it to the wok with metal tape and then drilled holes, wired them together, covered the ends with wire caps, and taped all that up. I covered the outside of the body with the metal tape to better insulate it, then I finished the bag - whew.

The part of the bag that was in the body of the wok when it was right side up was built to match the body of the wok, so when the thing was upside down and heating, all of the sand was inside the body and the flared part of the bag was empty.

When it was turned over, the warm sand dropped into the flared part of the bag. I heated it at 180 for about 20 minutes, then turned it up to 250 for 5 minutes. The sand was warm throughout, so I tipped it onto a flange stand with a misshapen straw cowboy hat for a test - it worked OK, but I had to iron the edges because there was not enough sand pushing down at that spot because the bag was too big.

7uba9aru.jpg


u3ypunyz.jpg


6ebuvyjy.jpg


mudezu6y.jpg


na8ujubu.jpg


Thoughts - First, I over killed the bag. It was too big, and too complicated of a build. I should have just sewn two circles together & turned them inside out to make a big pillow, or just bunched the material at the top with a strong thread. Second, the sand got good & warm throughout, but I couldn't feel the heat at the top. I ended up turning the wok up to 300 for about 10 minutes and shaking the bag to distribute the sand, and it was fine.

I then bunched the bag at the top with some wire to resize it and keep the warm sand where I want it - right over the brim. I then re-flanged a badly misshapen old Mallory Nokabout as a test. It came out really good, and in under 1/2 hour with no ironing.

I'll ultimately have to make still another bag. When I do, I will probably just make a big pillow that fits in the wok, with two leather or canvas reinforced handles, so I can pick it up, mix up the sand, and set it on the flange.

Frankly, a sandbag like that and a larger off the shelf electric wok would probably work just fine for home use, and that's what I recommend.
 
Last edited:

Mr.Astor

Banned
Messages
246
Location
New Jersey
So I cut the bottom out of the oil pan, taped it to the wok with metal tape and then drilled holes, wired them together, covered the ends with wire caps, and taped all that up. I covered the outside of the body with the metal tape to better insulate it, then I finished the bag - whew.

The part of the bag that was in the body of the wok when it was right side up was built to match the body of the wok, so when the thing was upside down and heating, all of the sand was inside the body and the flared part of the bag was empty.

When it was turned over, the warm sand dropped into the flared part of the bag. I heated it at 180 for about 20 minutes, then turned it up to 250 for 5 minutes. The sand was warm throughout, so I tipped it onto a flange stand with a misshapen straw cowboy hat for a test - it worked OK, but I had to iron the edges because there was not enough sand pushing down at that spot because the bag was too big.

7uba9aru.jpg


u3ypunyz.jpg


6ebuvyjy.jpg


mudezu6y.jpg


na8ujubu.jpg


Thoughts - First, I over killed the bag. It was too big, and too complicated of a build. I should have just sewn two circles together & turned them inside out to make a big pillow, or just bunched the material at the top with a strong thread. Second, the sand got good & warm throughout, but I couldn't feel the heat at the top. I ended up turning the wok up to 300 for about 10 minutes and shaking the bag to distribute the sand, and it was fine.

I then bunched the bag at the top with some wire to resize it and keep the warm sand where I want it - right over the brim. I then re-flanged a badly misshapen old Mallory Nokabout as a test. It came out really good, and in under 1/2 hour with no ironing.

I'll ultimately have to make still another bag. When I do, I will probably just make a big pillow that fits in the wok, with two leather or canvas reinforced handles, so I can pick it up, mix up the sand, and set it on the flange.

Frankly, a sandbag like that and a larger off the shelf electric wok would probably work just fine for home use, and that's what I recommend.

John, if I may make a suggestion, concerning your canvas bag. Take the bag put in a washing machine preferably a laundromat and wrap a stone or brick in cloth and wash it, maybe a couple of times. if you soften the canvas the sand will disperse equally all around. If you have to do it at home throw in an old sneaker with it. Hope that help's you out. The canvas is still to stiff,has areas that the sand will run to.
 

TheDane

Call Me a Cab
Messages
2,670
Location
Copenhagen, Denmark
John, if I may make a suggestion, concerning your canvas bag. Take the bag put in a washing machine preferably a laundromat and wrap a stone or brick in cloth and wash it, maybe a couple of times. if you soften the canvas the sand will disperse equally all around. If you have to do it at home throw in an old sneaker with it. Hope that help's you out. The canvas is still to stiff,has areas that the sand will run to.

I understand your theory, but I don't think, that will have substantially effect on the flanging result. If there's not enough sand (= weight) to stretch out creases in the canvas, it probably won't do much good to the felt underneath the bag in the first place(?)
 

John Galt

Vendor
Messages
2,080
Location
Chico
Thanks gents. I will wash & dry the canvas before I make the new bag regardless, to tighten up the weave. I sewed down the side creases in the old bag & took out all the wrinkles in the bottom. The problem, as Olė notes, was the distribution of sand. It's working well now, I just want to make it more wieldy.
 

Mr.Astor

Banned
Messages
246
Location
New Jersey
Nice ribbons John, one thing don't put pins in the ribbon you will end up with little holes all the way around the ribbon, rendering it useless. I've purchased vintage ribbons where the seller did this very disappointing.
Use a paper clip or fabric tape to hold your end.
 

Hatter4

One of the Regulars
Messages
226
Location
East Petersburg, PA
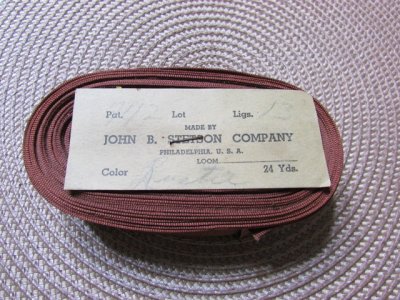
hatribbon.JPG Congratulations on your win of the ribbons. Vintage ribbons are always important. I have two full drawers of different colors and widths of ribbons - here is one of my most interesting. If you read the label, it says "made by John B Stetson and Company, Philadelphia". I think this is historically significant because it is a Stetson Company. I also have spools of thread that read "Hatter's Thread - Hatter's Supply House".
 

John Galt

Vendor
Messages
2,080
Location
Chico
Thanks Mr. Astor! The photos were actually auction photos, but I hadn't thought about the pinholes when purchasing. I usually put a rubber band around my own ribbon spools.

Thanks also for the tip Brad, and very cool ribbon Hatter4. I'm wondering if it was offered for sale by Stetson, or was just made for Stetson & labelled for it.
 

Forum statistics

Threads
109,120
Messages
3,074,542
Members
54,102
Latest member
TXG8R
Top