So, here we are - painting at last!
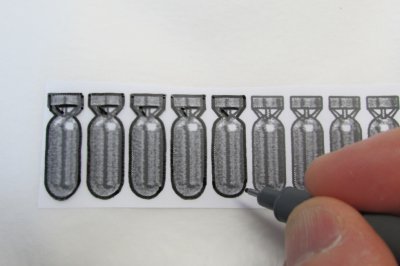
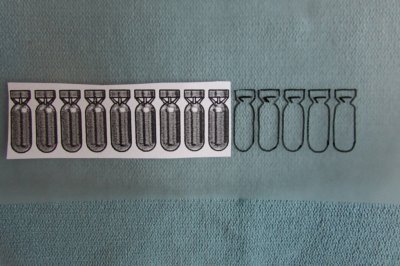
So you should have a stencil made, and to re-cap, here I am making my mission tally stencil:
As I said, you first need to create a white backdrop to your work in the shape of your letters or chosen design - to make your colours work properly. Try painting any red onto a backdrop of dark bitter chocolate- or seal brown-coloured piece of leather and you will instantly see it disappear into it and it will be almost indiscernible. However, try painting it on a white base and you will make the colour "pop" straight away.
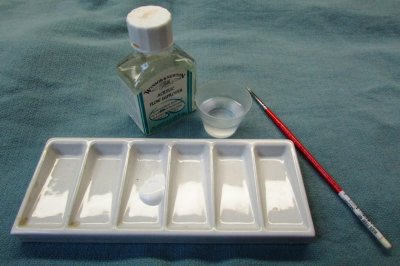
So, first you prepare some Flow Improver (10% to water by volume) and you will use that and mix into your white paint.
With your brush loaded appropriately, hold your stencil on your jacket and make a careful mental note of a position within the outline of the letter or design – keeping your eye on where that was on the jacket, flip back the stencil (like an animator of old) and put a touch of white paint where your mental note told you it would be. Carefully replace the stencil back over your mark of paint (being careful not to smudge the paint and get it on your stencil - but if you do, it just wipes off with a wet Q-Tip) and you should see the outline of the letter or design safely around it. Hopefully you got that right.
If you didn't, lift the stencil away from the paint and quickly remove the paint with a wet cloth or Q-Tip - and try again.
If you did get it right, you are on your way!
Add more paint towards the outline of the letter you want, continuing until you get precisely to the border outline as per your stencil.
To demonstrate this, I shall now add a mission tally to the front of the jacket (because we rescued a dog with a desperately sad tale from Mexico, so this jacket is a work in continual progress!).
So to recap, I have my stencil ready and have it in place.
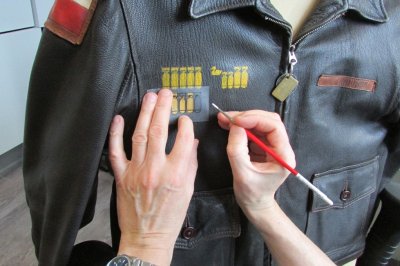
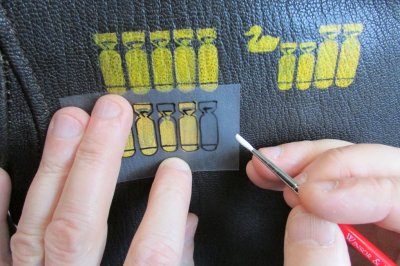
Then I lift back the stencil … and add my first dab of white – as a landmark of sorts.
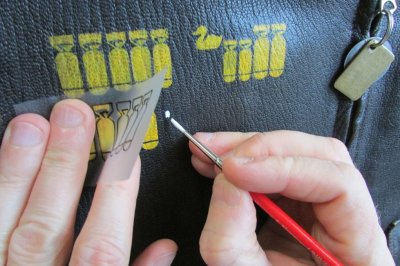
Then I replace the acetate sheet and want to see that the landmark I made is inside the outline of the bomb shape.
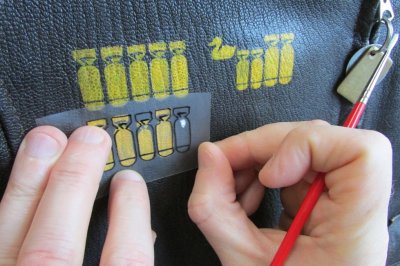
Then I lift the acetate and add more paint towards the edge of my bomb outline.
Then keep going, working the stencil back and forth as you review your progress.
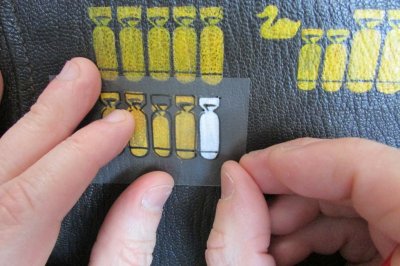
Continue to flesh out that letter/bomb tally/design until you have that silhouette complete. Then allow to dry (an hour for that first coat should be fine).
Then I add the Cadmium Yellow Deep.
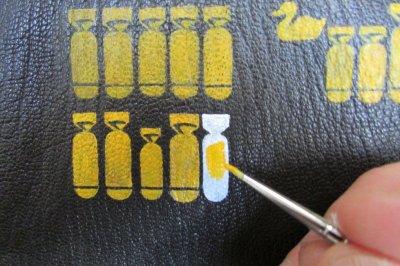
And I fill in the entire sihouette.
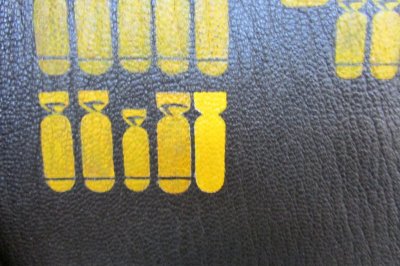
And I add a touch of Dark Umber/Mars Black to fill in the detail.
When it is dry, I go over again with a little Cadmium Yellow Deep to bring in the edges on the black detail and make it tidy.
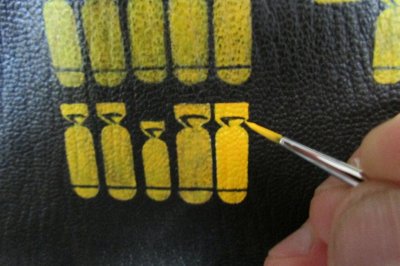
So using that same back-and-forth animator-style technique with the stencil to verify what you're doing, start doing the same with any other colours in the design. You will be amazed by how quickly you make progress.
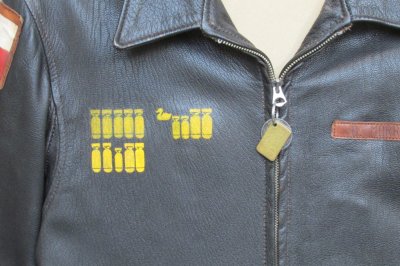
And if you make an error on the jacket by accidentally making the border too big or not straight enough and you wish to correct it but the paint has dried, then get the colours you'll need to match the colour of the hide of the jacket and paint over your mistake - so you're erasing your work that way, from the outside in towards the border on your stencil . Note that this colour-matching is tricky but very achievable. I know, I’ve done it. The paint will dry matt and the jacket will have a gloss/semi-gloss finish to it, so you will need to restore that satin finish over your correction to blend it in. More on that later ...
Also, the mission marker is looking very clean and bright at this point - and I will be toning it down with some "weathering" or "aging" to blend it in with the others. How I do that will be covered later in a section by itself.
And that's the basic principle of using the stencil and using the painting technique that I use.
So, next we move on to something a bit more advanced - but extending the same principles - and Lucky Dog …
End of Part 5.
So you should have a stencil made, and to re-cap, here I am making my mission tally stencil:


As I said, you first need to create a white backdrop to your work in the shape of your letters or chosen design - to make your colours work properly. Try painting any red onto a backdrop of dark bitter chocolate- or seal brown-coloured piece of leather and you will instantly see it disappear into it and it will be almost indiscernible. However, try painting it on a white base and you will make the colour "pop" straight away.
So, first you prepare some Flow Improver (10% to water by volume) and you will use that and mix into your white paint.

With your brush loaded appropriately, hold your stencil on your jacket and make a careful mental note of a position within the outline of the letter or design – keeping your eye on where that was on the jacket, flip back the stencil (like an animator of old) and put a touch of white paint where your mental note told you it would be. Carefully replace the stencil back over your mark of paint (being careful not to smudge the paint and get it on your stencil - but if you do, it just wipes off with a wet Q-Tip) and you should see the outline of the letter or design safely around it. Hopefully you got that right.
If you didn't, lift the stencil away from the paint and quickly remove the paint with a wet cloth or Q-Tip - and try again.
If you did get it right, you are on your way!
Add more paint towards the outline of the letter you want, continuing until you get precisely to the border outline as per your stencil.
To demonstrate this, I shall now add a mission tally to the front of the jacket (because we rescued a dog with a desperately sad tale from Mexico, so this jacket is a work in continual progress!).
So to recap, I have my stencil ready and have it in place.


Then I lift back the stencil … and add my first dab of white – as a landmark of sorts.

Then I replace the acetate sheet and want to see that the landmark I made is inside the outline of the bomb shape.

Then I lift the acetate and add more paint towards the edge of my bomb outline.
Then keep going, working the stencil back and forth as you review your progress.

Continue to flesh out that letter/bomb tally/design until you have that silhouette complete. Then allow to dry (an hour for that first coat should be fine).
Then I add the Cadmium Yellow Deep.

And I fill in the entire sihouette.

And I add a touch of Dark Umber/Mars Black to fill in the detail.
When it is dry, I go over again with a little Cadmium Yellow Deep to bring in the edges on the black detail and make it tidy.

So using that same back-and-forth animator-style technique with the stencil to verify what you're doing, start doing the same with any other colours in the design. You will be amazed by how quickly you make progress.

And if you make an error on the jacket by accidentally making the border too big or not straight enough and you wish to correct it but the paint has dried, then get the colours you'll need to match the colour of the hide of the jacket and paint over your mistake - so you're erasing your work that way, from the outside in towards the border on your stencil . Note that this colour-matching is tricky but very achievable. I know, I’ve done it. The paint will dry matt and the jacket will have a gloss/semi-gloss finish to it, so you will need to restore that satin finish over your correction to blend it in. More on that later ...
Also, the mission marker is looking very clean and bright at this point - and I will be toning it down with some "weathering" or "aging" to blend it in with the others. How I do that will be covered later in a section by itself.
And that's the basic principle of using the stencil and using the painting technique that I use.
So, next we move on to something a bit more advanced - but extending the same principles - and Lucky Dog …
End of Part 5.
Last edited:


