KilroyCD
One Too Many
- Messages
- 1,966
- Location
- Lancaster County, PA
I've had a number of enquiries about refinishing Civilian Defense helmets over the past year. Most people have asked "How much to refinish my helmet?", and some have asked for pointers on how to refinish theirs. As a result, I've decided to post a step-by-step tutorial on how to refinish a CD helmet.
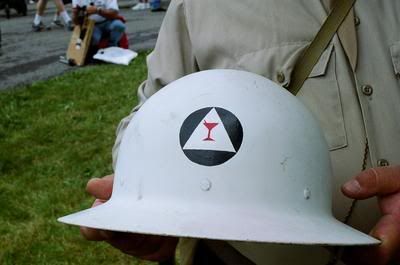
First, let me show you an Air Raid Warden's helmet:
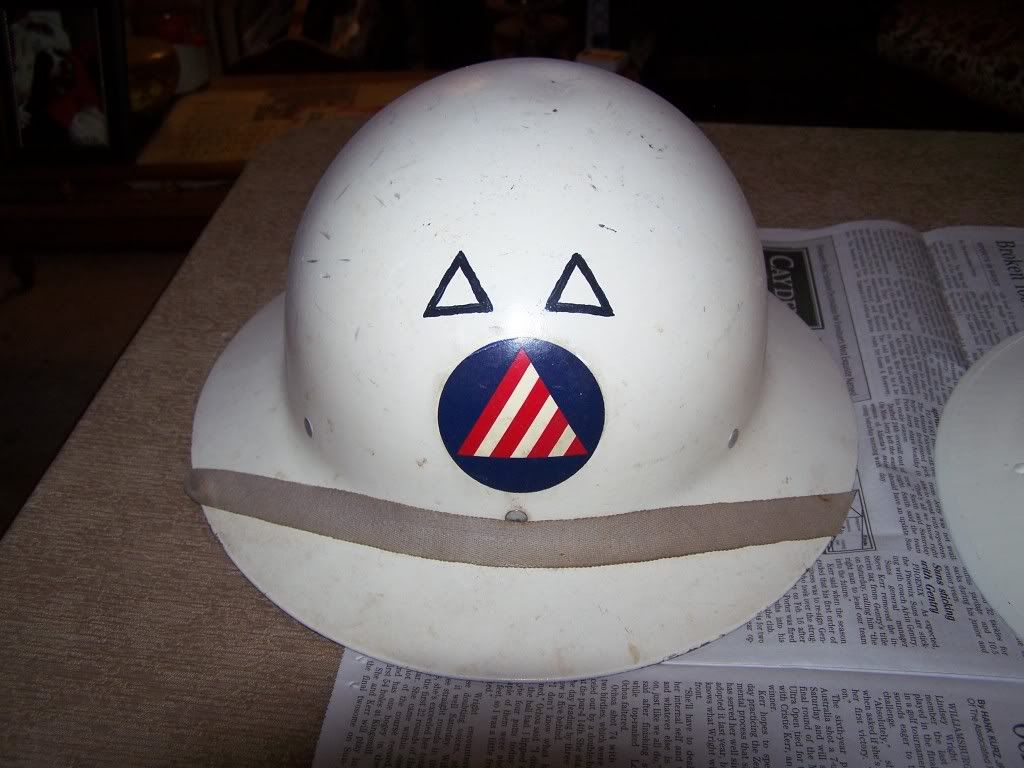
This isn't entirely a typical helmet, as the two white triangles indicate a Chief Air Raid Warden , but everything else is typical. Notice that the white paint is not stark (or "appliance") white. It's more of an antique white or eggshell white. That is the colour one will need to use when spray painting the helmet itself.
For this excercise, we're going to assume that the typical helmet in need of refinishing will have some surface rust and the paint will be in bad shape. Remove the surface rust using a Scotchbrite pad, steel wool or fine sandpaper (depending on the severity of the rust). If there is an insignia or the remains of an insignia on the helmet, do what you can to protect it. Original insignia will add value to helmets, or if the remains are just vestigial the remains can serve as a guide when recreating the insignia.
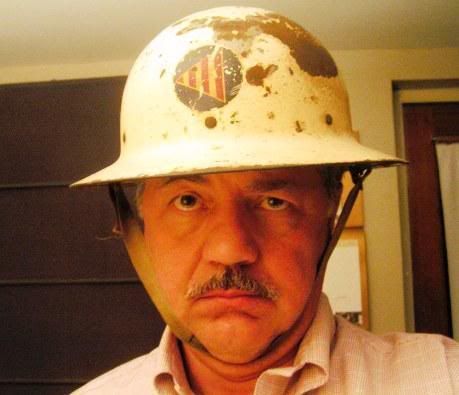
The helmet to be refinished belongs to fellow Lounger Mr.K.L. Bowers, and Kim had already sprayed the helmet in antique white before bringing it to me.
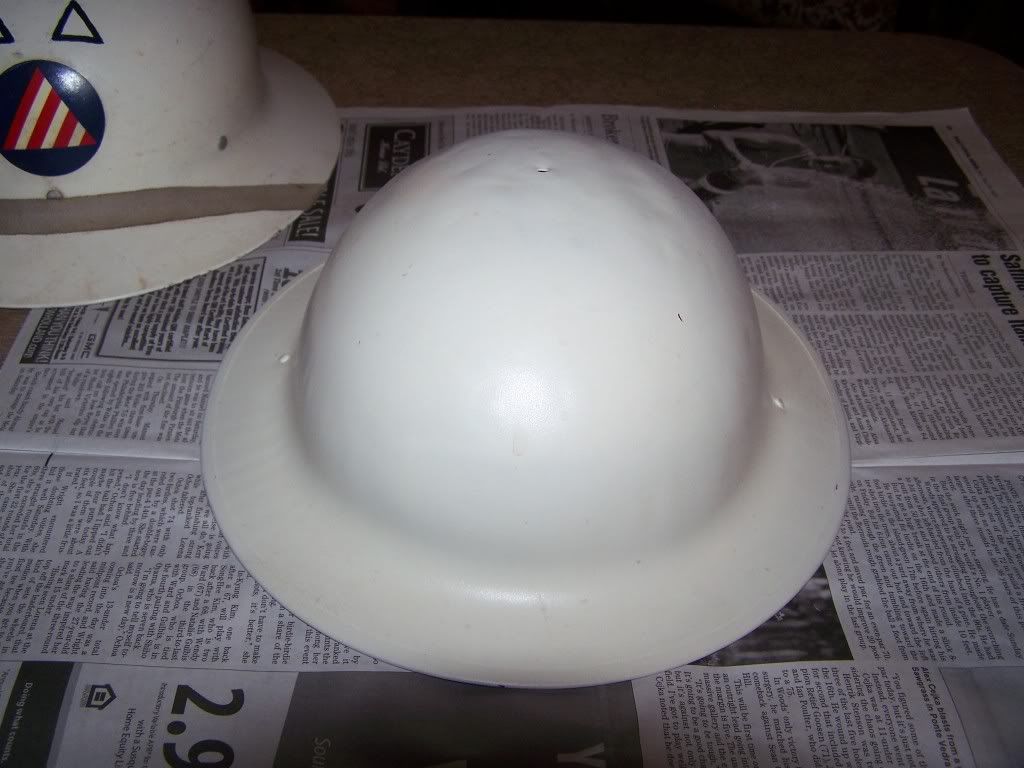
His helmet is the earlier M-1917 or "Kelly" helmet. Many of these were used by CD before the later (deeper) ones specifically made for CD came into the pipeline.
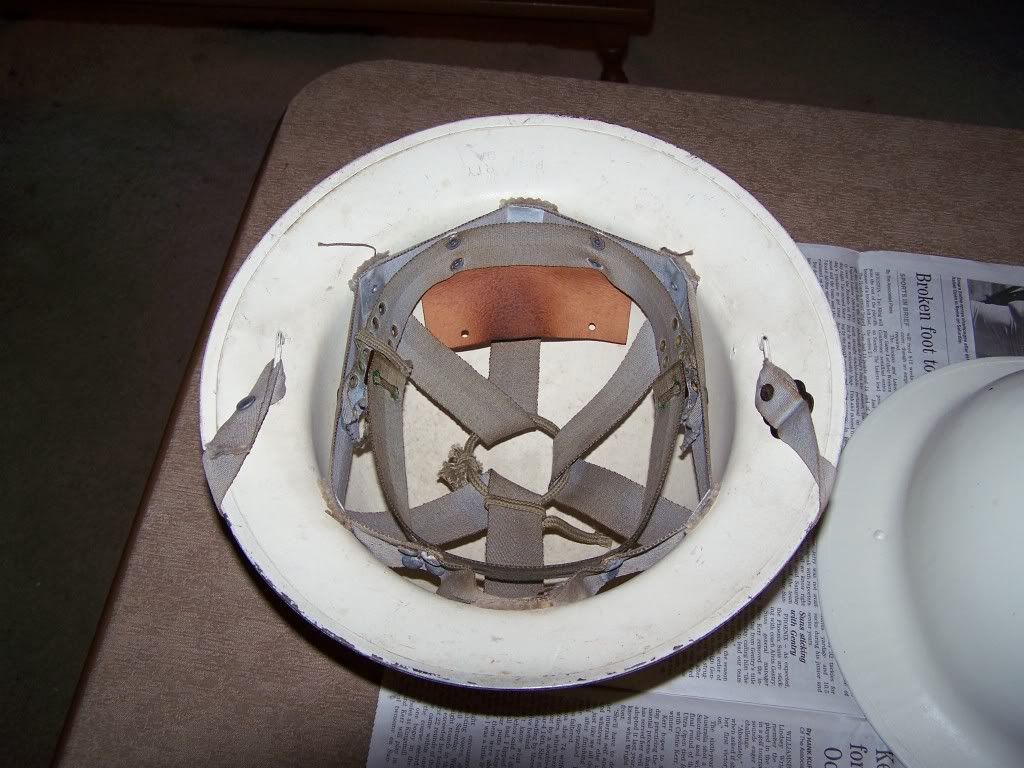
With the Kelly helmet, the suspension is (usually) removable which facilitates painting the underside. The suspension of the later helmet is riveted into place and cannot be removed for painting, so one has to do their best to mask it off and work around it. Here's a shot of the later helmet's suspension:
Now, as mentioned earlier, the correct colour to paint the helmet is eggshell or antique white. For the insignia, I chose Model Master acrylic paints because they are fast drying and clean up with water. For the red I use "Guards Red", and for the navy blue I use "Blue Angel Navy Blue". These colours match the original decal (on my Chief ARW helmet) almost exactly. As there were several manufacturers of decals, colours can and will vary slightly. Keep in mind that many people painted the insignia on their helmet during the war. A painted insigia on a CD helmet is indeed 100% historically accurate. I have several helmets with original hand-painted insignia, and like the decals these could vary greatly in size from the standard 2" or 2.25" helmet decal size to the 4" size. Four-inch insignia were meant originally for vehicles, but many of these decals found their way onto helmets as well. For this helmet, I'm going to recreate the Air Raid Warden's insignia in the 2" size.
Since the halmet was already repainted in eggshell white, I only needed to take care of the insignia.
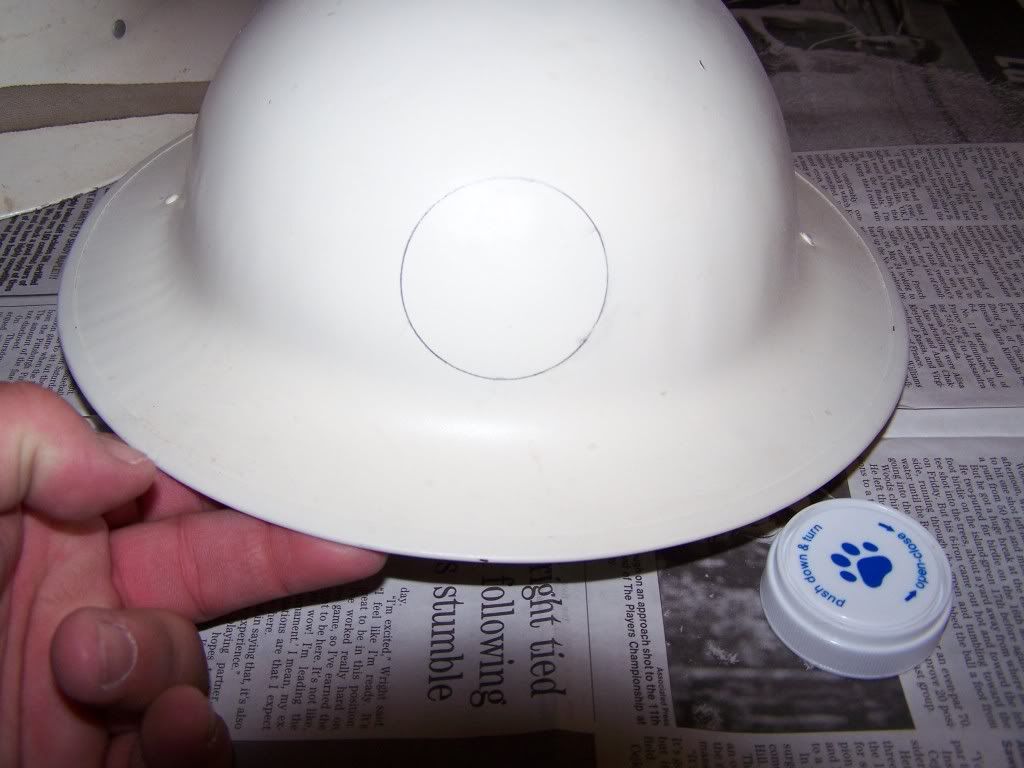
Materials needed to replicate the insgnia are a sharp pencil (or a mechanical pencil), a fine tip paint brush, paints, a straight edge, a ruler (or tape measure) and either a compass or a round object that matches the size insignia you wish to paint. I was fortunate to have found a cap from a medicine jar that is two inches in diameter. I used that as my template and using a mechanical pencil drew a two inch circle on the front of the helmet:
Using my tape measure, I measured across the flat side of the triangle of an original insignia and found that for a 2' diameter insignia, each side of the triangle needs to be 1 11/16". I measured out my triangle on the circle, and using a straight edge, drew the triangle:
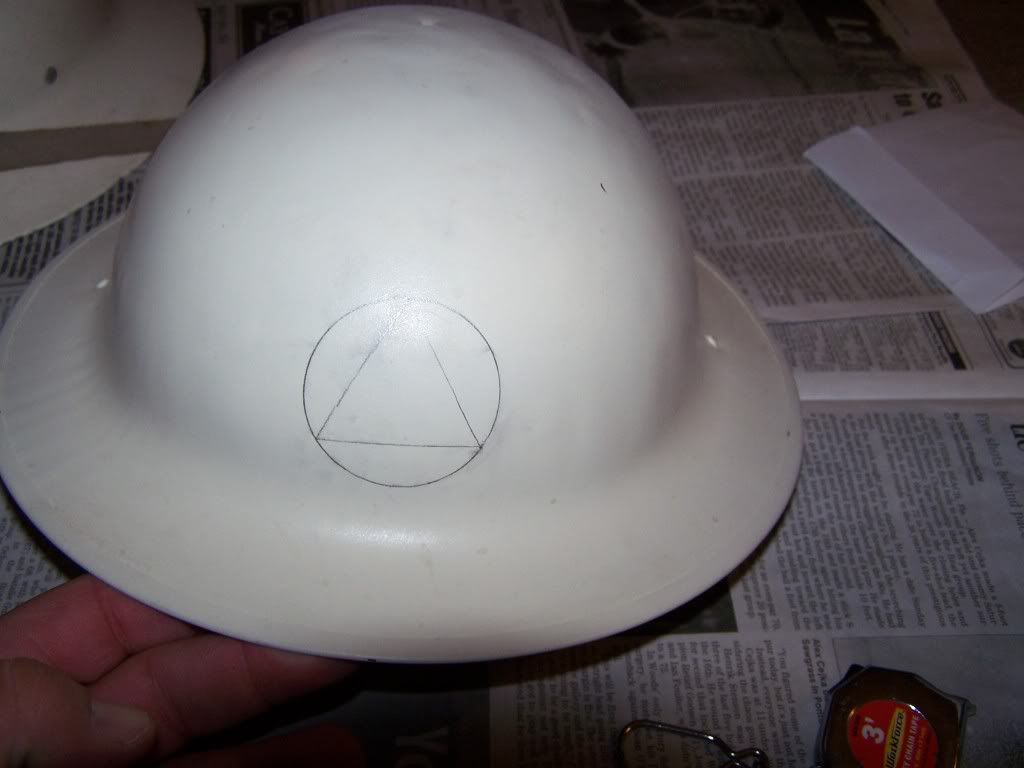
I used an envelope as a straight edge in order to keep the edge against the helmet. The curvature of the helmet makes it more difficult to use a ruler for this process, so something flexible works best. Hence the envelope.
I measured the width of the stripes (four red, three white) and using the tape measure marked off where they intersected the sides of the triangle. Using the envelope I then drew in the lines for the stripes. The insignia is now ready to be painted:
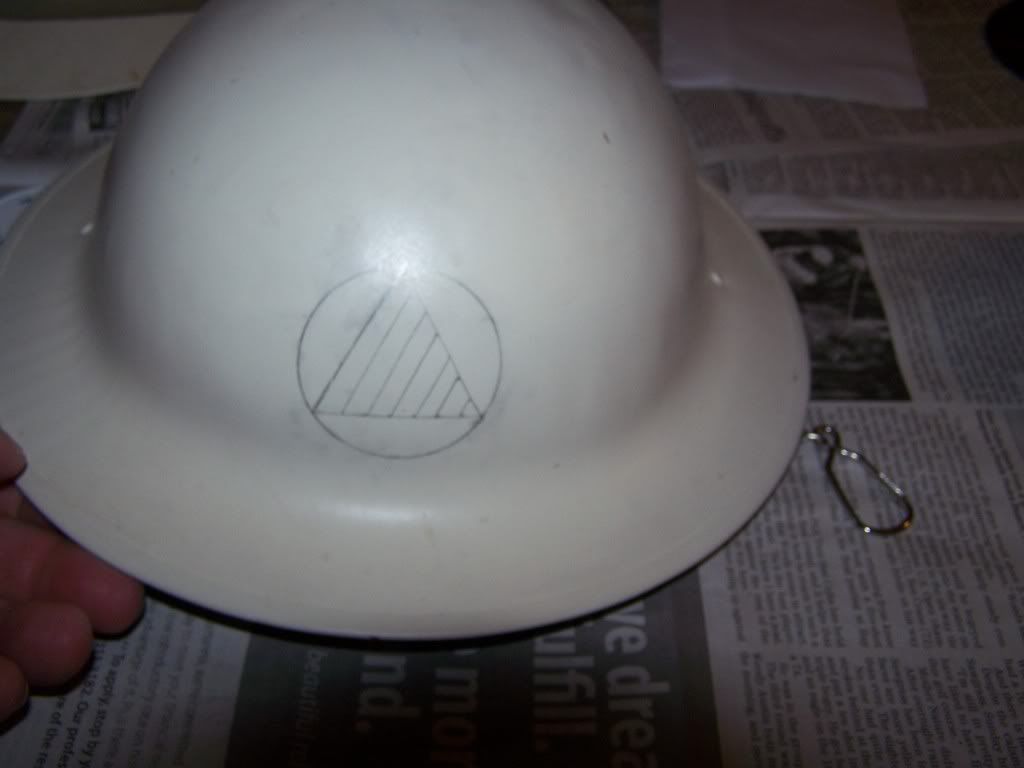
I started with the red first. I've discovered through trial and error (mainly error) that it's easier to start at the center and work outwards than it is to start at the outside and try to keep one's fingers from smearing wet paint.
I painted the red stripes, then gave them a few minutes to dry to the touch:
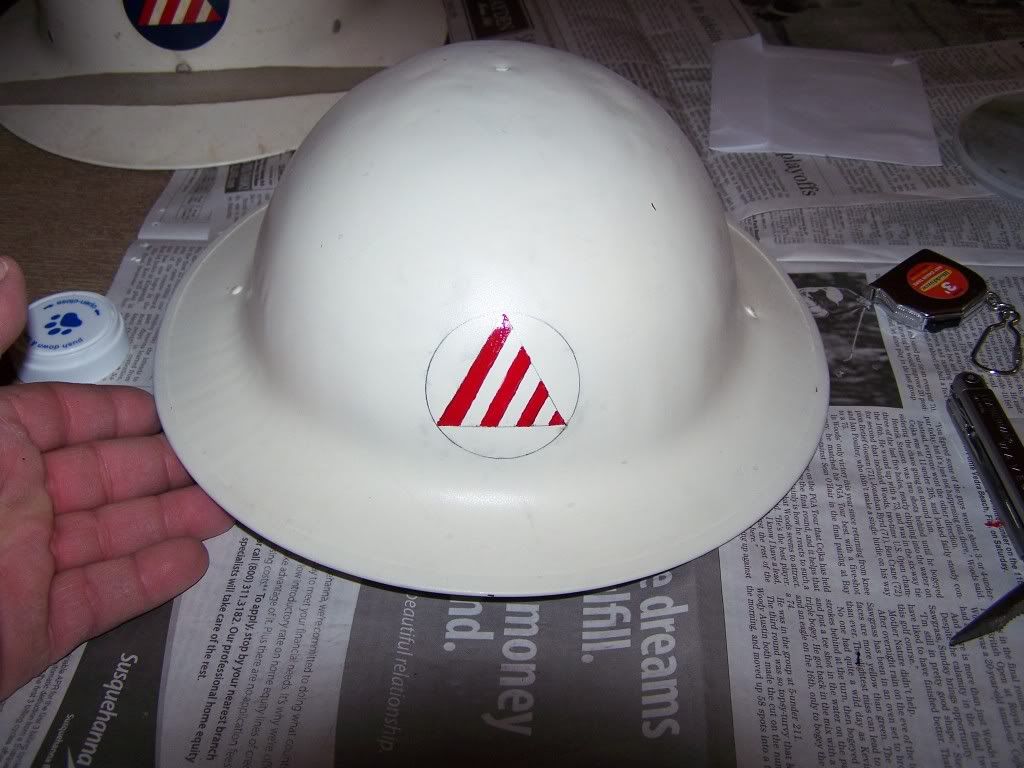
Once the stripes were dry, I started painting the three navy blue sections outside the triangle. Just keep a steady hand and keep some water handy (to quickly correct any mistakes), and the insignia should take shape in short order.
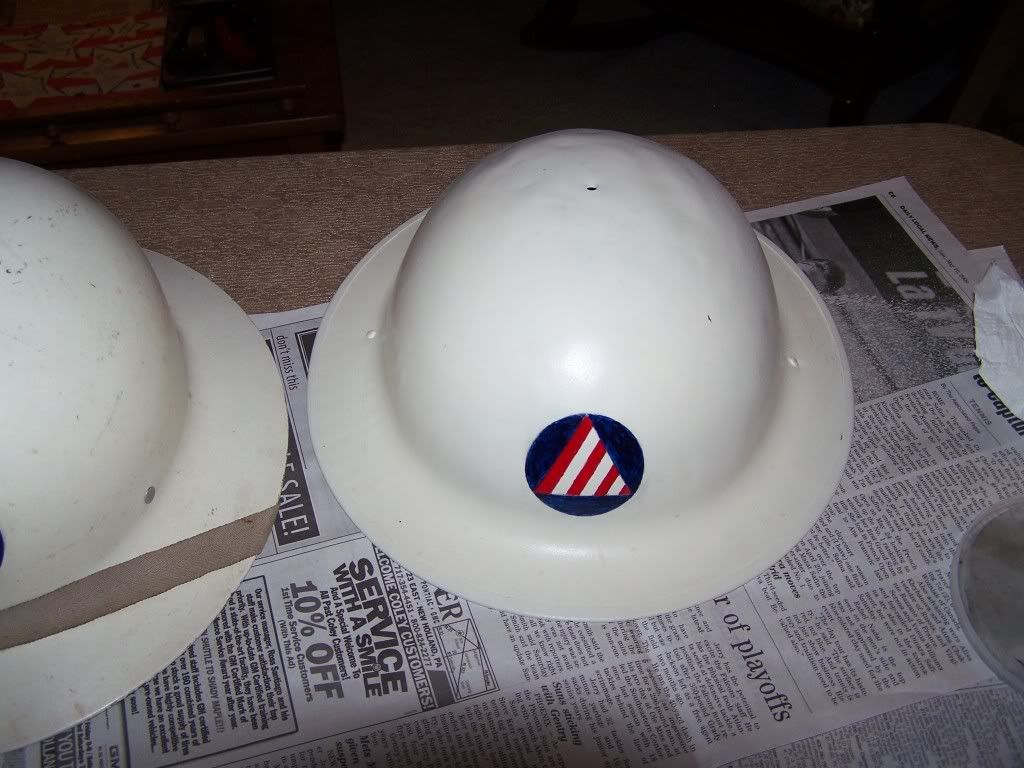
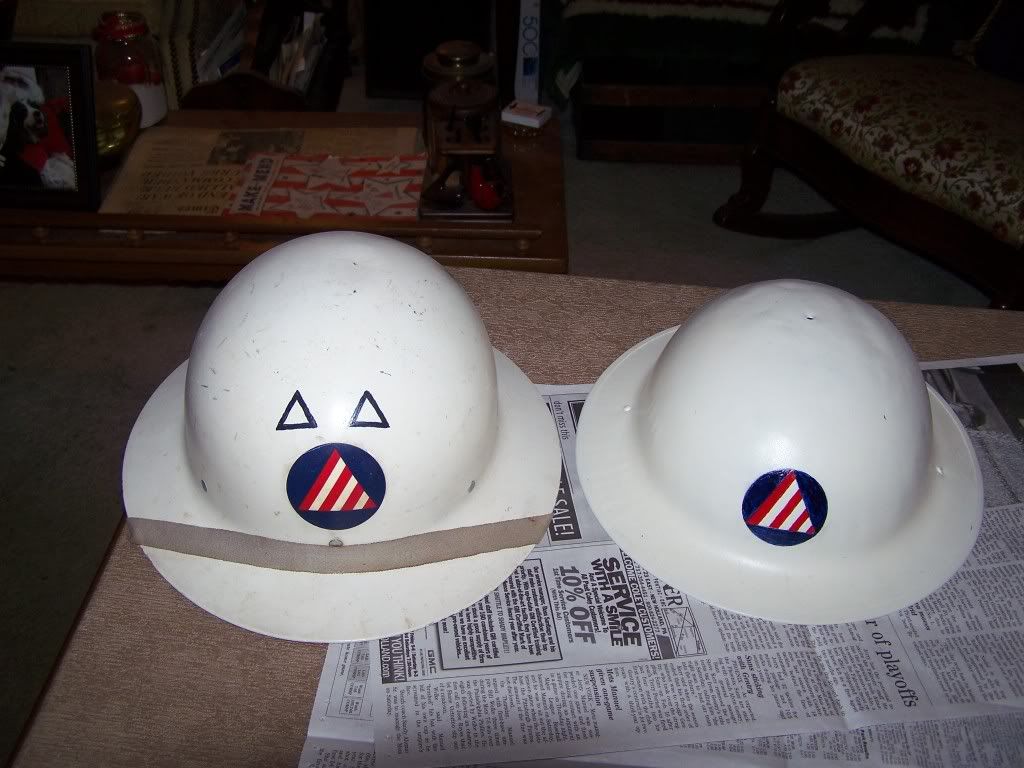
The total elapsed time (including to take photos) to scribe the design and paint was a little more than one hour. Here is the refinished ARW helmet next to the original:
Kim, your helmet is ready!
First, let me show you an Air Raid Warden's helmet:

This isn't entirely a typical helmet, as the two white triangles indicate a Chief Air Raid Warden , but everything else is typical. Notice that the white paint is not stark (or "appliance") white. It's more of an antique white or eggshell white. That is the colour one will need to use when spray painting the helmet itself.
For this excercise, we're going to assume that the typical helmet in need of refinishing will have some surface rust and the paint will be in bad shape. Remove the surface rust using a Scotchbrite pad, steel wool or fine sandpaper (depending on the severity of the rust). If there is an insignia or the remains of an insignia on the helmet, do what you can to protect it. Original insignia will add value to helmets, or if the remains are just vestigial the remains can serve as a guide when recreating the insignia.
The helmet to be refinished belongs to fellow Lounger Mr.K.L. Bowers, and Kim had already sprayed the helmet in antique white before bringing it to me.

His helmet is the earlier M-1917 or "Kelly" helmet. Many of these were used by CD before the later (deeper) ones specifically made for CD came into the pipeline.
With the Kelly helmet, the suspension is (usually) removable which facilitates painting the underside. The suspension of the later helmet is riveted into place and cannot be removed for painting, so one has to do their best to mask it off and work around it. Here's a shot of the later helmet's suspension:

Now, as mentioned earlier, the correct colour to paint the helmet is eggshell or antique white. For the insignia, I chose Model Master acrylic paints because they are fast drying and clean up with water. For the red I use "Guards Red", and for the navy blue I use "Blue Angel Navy Blue". These colours match the original decal (on my Chief ARW helmet) almost exactly. As there were several manufacturers of decals, colours can and will vary slightly. Keep in mind that many people painted the insignia on their helmet during the war. A painted insigia on a CD helmet is indeed 100% historically accurate. I have several helmets with original hand-painted insignia, and like the decals these could vary greatly in size from the standard 2" or 2.25" helmet decal size to the 4" size. Four-inch insignia were meant originally for vehicles, but many of these decals found their way onto helmets as well. For this helmet, I'm going to recreate the Air Raid Warden's insignia in the 2" size.
Since the halmet was already repainted in eggshell white, I only needed to take care of the insignia.
Materials needed to replicate the insgnia are a sharp pencil (or a mechanical pencil), a fine tip paint brush, paints, a straight edge, a ruler (or tape measure) and either a compass or a round object that matches the size insignia you wish to paint. I was fortunate to have found a cap from a medicine jar that is two inches in diameter. I used that as my template and using a mechanical pencil drew a two inch circle on the front of the helmet:

Using my tape measure, I measured across the flat side of the triangle of an original insignia and found that for a 2' diameter insignia, each side of the triangle needs to be 1 11/16". I measured out my triangle on the circle, and using a straight edge, drew the triangle:

I used an envelope as a straight edge in order to keep the edge against the helmet. The curvature of the helmet makes it more difficult to use a ruler for this process, so something flexible works best. Hence the envelope.
I measured the width of the stripes (four red, three white) and using the tape measure marked off where they intersected the sides of the triangle. Using the envelope I then drew in the lines for the stripes. The insignia is now ready to be painted:

I started with the red first. I've discovered through trial and error (mainly error) that it's easier to start at the center and work outwards than it is to start at the outside and try to keep one's fingers from smearing wet paint.
I painted the red stripes, then gave them a few minutes to dry to the touch:

Once the stripes were dry, I started painting the three navy blue sections outside the triangle. Just keep a steady hand and keep some water handy (to quickly correct any mistakes), and the insignia should take shape in short order.

The total elapsed time (including to take photos) to scribe the design and paint was a little more than one hour. Here is the refinished ARW helmet next to the original:

Kim, your helmet is ready!
