Want to buy or sell something? Check the classifieds
  • The Fedora Lounge is supported in part by commission earning affiliate links sitewide. Please support us by using them. You may learn more here.

Building a bookcase by hand.

JB442

New in Town
Messages
9
So I enjoy reading and woodworking, so one of my projects was to build myself a book case using zero electricity except for lights in the shop. And a radio. IMG_20210829_092619628.jpg
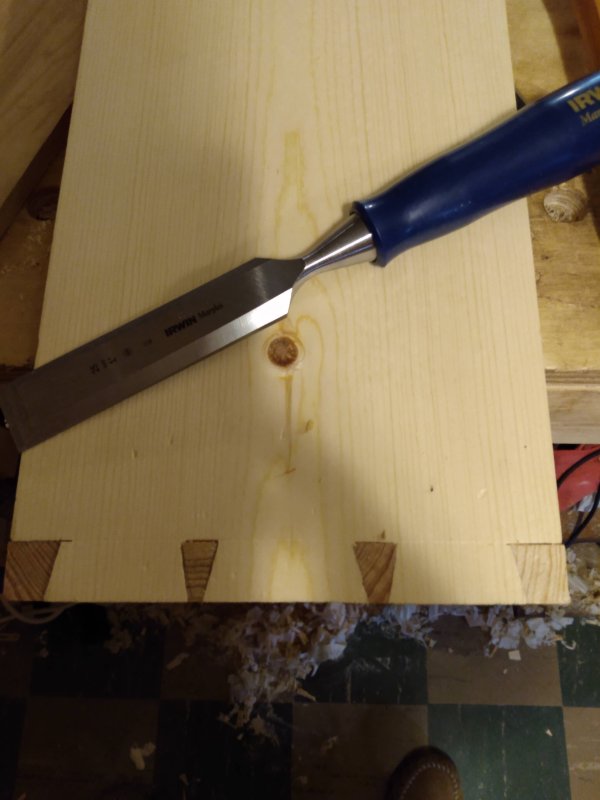
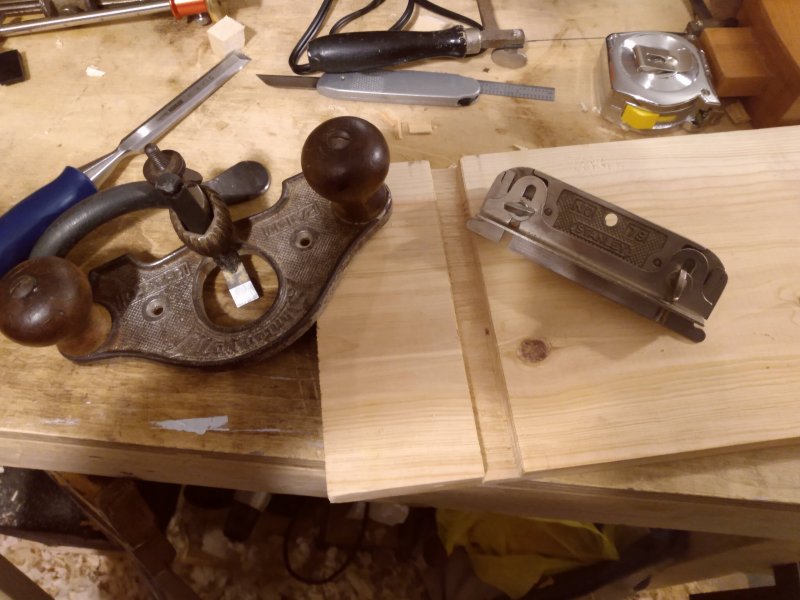
The top of the carcass is dovetailed and the sides are held by hand cut dados and the shelves will keep them together. The top will have a cap and a beveled accent that covers most of the dovetail but it's the traditional way, and dovetails were historically covered up most of the time anyway. The dado wall are cut to depth with a back saw, the majority of waste is cleared with a chisel, and a router plane brings them down to depth.
IMG_20210909_201713342.jpg
IMG_20211028_192608336.jpg
All the surfaces are finished by hand with a smoothing plane. I hate sandpaper. The top is getting fitted and it's now ready to start getting some trim. IMG_20211220_184724738.jpg
IMG_20220108_152958544.jpg
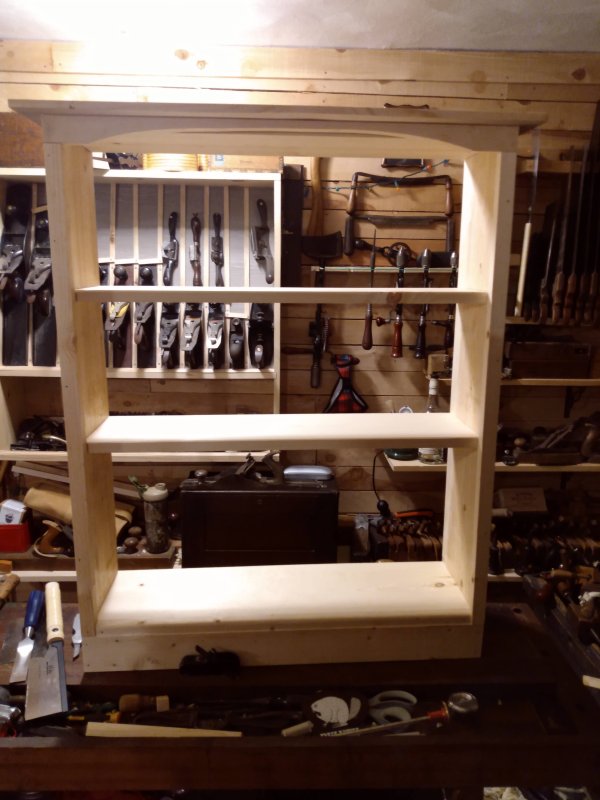
And here is the finished assembly the curved part at the top gave me a little trouble and I cut the curve a little too deep, but live and learn. The curve was made with a compass plane and spokeshaves, and all the trim was ripped with hand saw and fitted by hand.

I know I could have built this in a few days with power tools, but I don't miss having to use ear muffs and a dust mask and the possibility of missing a finger from the table saw. It was a very enjoyable process for me.

Thanks for looking!
 
Messages
10,849
Location
vancouver, canada
So I enjoy reading and woodworking, so one of my projects was to build myself a book case using zero electricity except for lights in the shop. And a radio. View attachment 497581
The top of the carcass is dovetailed and the sides are held by hand cut dados and the shelves will keep them together. The top will have a cap and a beveled accent that covers most of the dovetail but it's the traditional way, and dovetails were historically covered up most of the time anyway. The dado wall are cut to depth with a back saw, the majority of waste is cleared with a chisel, and a router plane brings them down to depth.
View attachment 497583
View attachment 497582
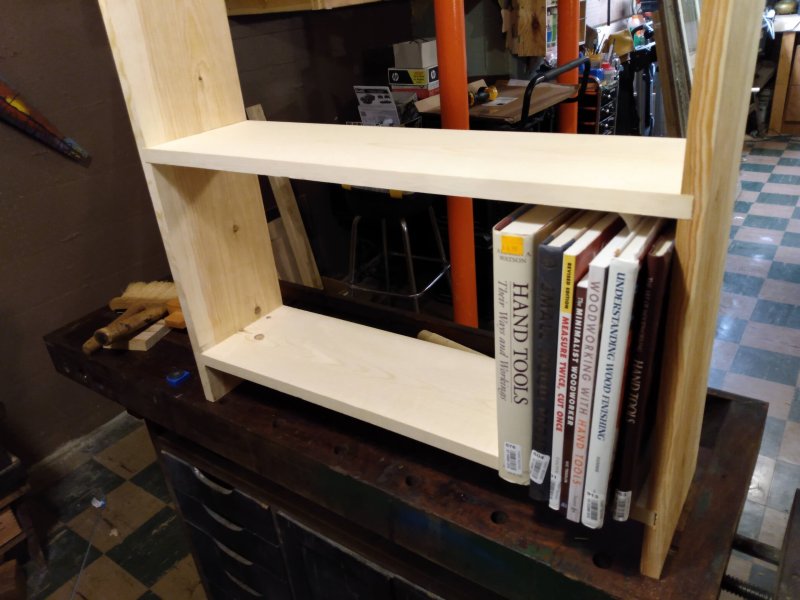
All the surfaces are finished by hand with a smoothing plane. I hate sandpaper. The top is getting fitted and it's now ready to start getting some trim. View attachment 497585
View attachment 497594
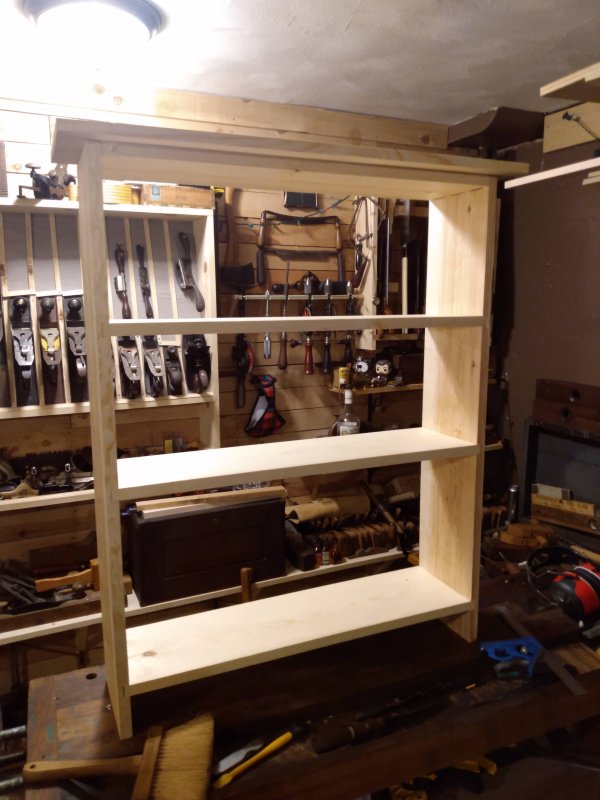
And here is the finished assembly the curved part at the top gave me a little trouble and I cut the curve a little too deep, but live and learn. The curve was made with a compass plane and spokeshaves, and all the trim was ripped with hand saw and fitted by hand.

I know I could have built this in a few days with power tools, but I don't miss having to use ear muffs and a dust mask and the possibility of missing a finger from the table saw. It was a very enjoyable process for me.

Thanks for looking!
Great work. My only construct not using power tools was also a bookcase but I had help from Ikea.
 

AbbaDatDeHat

I'll Lock Up
Messages
8,850
So I enjoy reading and woodworking, so one of my projects was to build myself a book case using zero electricity except for lights in the shop. And a radio. View attachment 497581
The top of the carcass is dovetailed and the sides are held by hand cut dados and the shelves will keep them together. The top will have a cap and a beveled accent that covers most of the dovetail but it's the traditional way, and dovetails were historically covered up most of the time anyway. The dado wall are cut to depth with a back saw, the majority of waste is cleared with a chisel, and a router plane brings them down to depth.
View attachment 497583
View attachment 497582
All the surfaces are finished by hand with a smoothing plane. I hate sandpaper. The top is getting fitted and it's now ready to start getting some trim. View attachment 497585
View attachment 497594
And here is the finished assembly the curved part at the top gave me a little trouble and I cut the curve a little too deep, but live and learn. The curve was made with a compass plane and spokeshaves, and all the trim was ripped with hand saw and fitted by hand.

I know I could have built this in a few days with power tools, but I don't miss having to use ear muffs and a dust mask and the possibility of missing a finger from the table saw. It was a very enjoyable process for me.

Thanks for looking!
Great job 442!
Now you have something that In 50 or 60 years your grand children can say their old Grandpa made out of REAL wood using just hand tools. Their friends and family will be amazed and rush to whatever interstellar resource our Google became to find out what real wood and hand tools are.
You also have something now that your great grandparents made out of necessity. I’m sure you’ve made them smile.
Priceless!!
B
 

JB442

New in Town
Messages
9
Great job 442!
Now you have something that In 50 or 60 years your grand children can say their old Grandpa made out of REAL wood using just hand tools. Their friends and family will be amazed and rush to whatever interstellar resource our Google became to find out what real wood and hand tools are.
You also have something now that your great grandparents made out of necessity. I’m sure you’ve made them smile.
Priceless!!
B
Thank you! I hope it lasts 50-60 years. I tried to use time tested techniques. I know it will last longer than a Walmart press board special.

And hopefully my grandkids will be using my tools! I have some I have rescued that date to the 1870's. If they have lasted this long they should last another 150 if I take care of them.
 

Tiki Tom

My Mail is Forwarded Here
Messages
3,398
Location
Oahu, North Polynesia
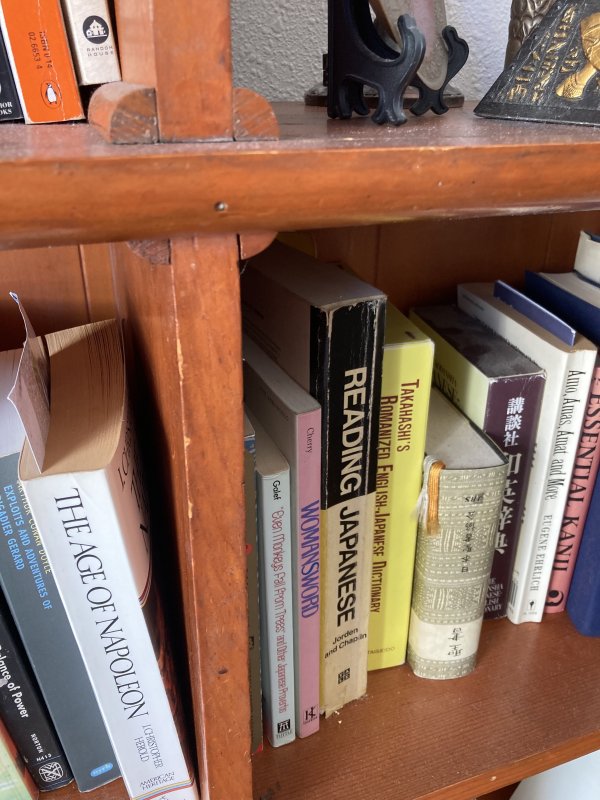
Nicely done. deHat is correct: it will become a treasured family heirloom. The photo below is of a bookcase that my father built by hand in about 1960. I frequently marvel at how over-engineered the joints are. (He was a German aircraft engineer.) It was built to last and has survived many a move. His grandkids know exactly who built it and will inherit it in due time. May your bookcase last as long and be equally cherished.
A job well done. Congratulations.

CFE582B5-2EF9-4707-ACB2-64B0224FC9B4.jpeg
 
Messages
10,939
Location
My mother's basement
Besides the occasional indigestion, the only lasting reminder of a girlfriend of 40-plus years ago is a bookcase she fashioned by hand that now occupies a spot in my library, a space a real estate agent would call a bedroom. If I’m remembering correctly, the bookcase has moved half a dozen times. It ain’t the prettiest thing (which is fitting, considering who made it), but it’s certainly sturdy enough (ditto).
 
Messages
10,939
Location
My mother's basement
Thank you! I hope it lasts 50-60 years. I tried to use time tested techniques. I know it will last longer than a Walmart press board special.

And hopefully my grandkids will be using my tools! I have some I have rescued that date to the 1870's. If they have lasted this long they should last another 150 if I take care of them.
I can‘t think of a reason it shouldn’t last centuries, provided it isn’t left exposed to the elements or otherwise subjected to treatment it wasn’t made for. If it’s used as a place to shelve books, it‘s hard to see how it would suffer much from that.
 

Edward

Bartender
Messages
25,081
Location
London, UK
So I enjoy reading and woodworking, so one of my projects was to build myself a book case using zero electricity except for lights in the shop. And a radio. View attachment 497581
The top of the carcass is dovetailed and the sides are held by hand cut dados and the shelves will keep them together. The top will have a cap and a beveled accent that covers most of the dovetail but it's the traditional way, and dovetails were historically covered up most of the time anyway. The dado wall are cut to depth with a back saw, the majority of waste is cleared with a chisel, and a router plane brings them down to depth.
View attachment 497583
View attachment 497582
All the surfaces are finished by hand with a smoothing plane. I hate sandpaper. The top is getting fitted and it's now ready to start getting some trim. View attachment 497585
View attachment 497594
And here is the finished assembly the curved part at the top gave me a little trouble and I cut the curve a little too deep, but live and learn. The curve was made with a compass plane and spokeshaves, and all the trim was ripped with hand saw and fitted by hand.

I know I could have built this in a few days with power tools, but I don't miss having to use ear muffs and a dust mask and the possibility of missing a finger from the table saw. It was a very enjoyable process for me.

Thanks for looking!
Very nice! The joy especially of this too is that you can set the shelves at a distance that works for real books. Buying pre-made these days I find it almost impossible to find a book case that doesn't waste a vast amount of space by having all the shelves space twice the distance apart as would facilitate 99% of my books.
 

Forum statistics

Threads
109,256
Messages
3,077,417
Members
54,183
Latest member
UrbanGraveDave
Top