Want to buy or sell something? Check the classifieds
  • The Fedora Lounge is supported in part by commission earning affiliate links sitewide. Please support us by using them. You may learn more here.

Anybody Else Collect Sewing Machines?

Shangas

I'll Lock Up
Messages
6,116
Location
Melbourne, Australia
At the back of the machine is the BALANCE WHEEL (also called the handwheel).

The silver "clutch-wheel" inside is what controls the needle-bar.

Loosening the clutch-wheel disengages the needle-mechanism. The handwheel will then spin freely, without driving the needle-bar. This is so that you can engage the BOBBIN WINDER mechanism against the handwheel, to wind up thread onto your bobbins.

IF this mechanism doesn't work (unlikely), or it's skipping and doesn't catch, then you'll have to remove the clutch-wheel (there's a screw there) and take it off and clean and lubricate inside, and then reassemble it. It's pretty easy to do. You don't need too much oil here. A couple of drops will suffice.
 

1930artdeco

Practically Family
Messages
673
Location
oakland
Well, finally got some original bobbins and instruction book. I filled up a bobbin and threaded the machine last night. So I am off to try and set the tension correctly (that could take awhile). Then practice sewing to see how the machine works.

Mike
 

Shangas

I'll Lock Up
Messages
6,116
Location
Melbourne, Australia
Tension is a process of trial and error. It very much depends on the type of fabric you're sewing.

Foot-tension has to be LIGHT for light fabrics, but tighter for thicker fabrics (otherwise the needle yanks the fabric up with it as it sews along).

Thread-tension is something you have to play by ear. But once you've got a good tension going, it's bset not to touch it.
 

TackCollector

Familiar Face
Messages
72
Location
NW PA / NW OH
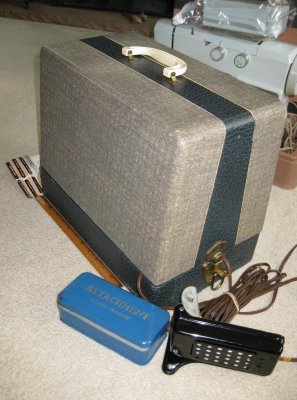
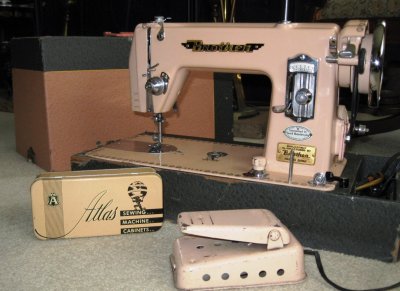
I finally cleaned up that pink Brother / Atlas sewing machine that I bought a couple of years ago.

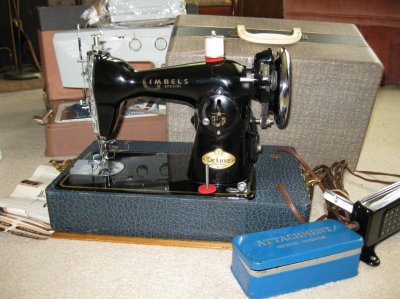
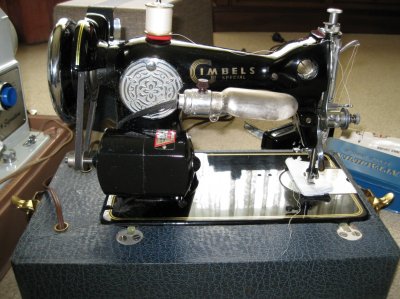
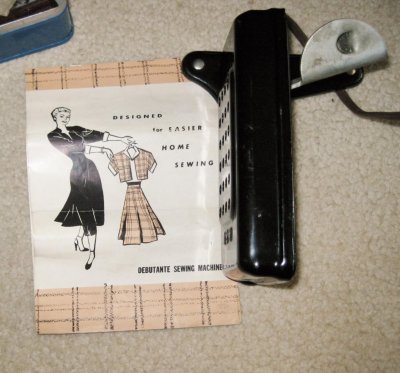
And the black machine is a Japanese-made clone of a Singer 15, except that it's a 3/4 size machine. The manual says Debutante and the machine is badged as a Gimbles, the department store chain. The black machine belonged to my great aunt and looks like it was never used.

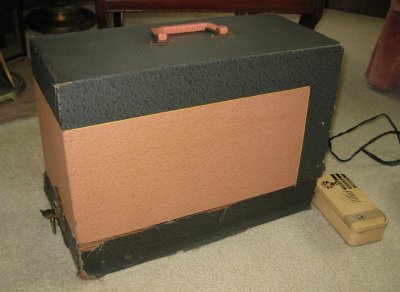
These postwar Japanese machines even came with color-coordinated wooden cases. Ah, the Nifty 'Fifties. :D


verdeen4.jpg IMG_1841.jpg IMG_1781.jpg IMG_1837.jpg IMG_1822.jpg IMG_1814.jpg
 

TackCollector

Familiar Face
Messages
72
Location
NW PA / NW OH
IMG_1790.jpg IMG_1791.jpg IMG_1792.jpg

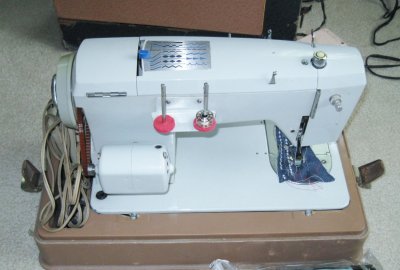
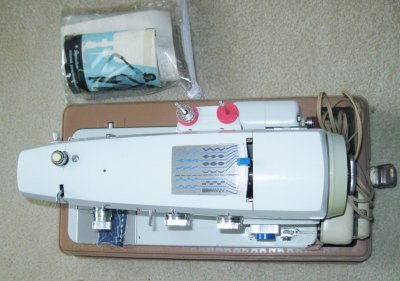
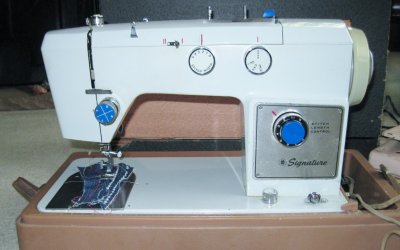
My other thrift store find is this Montgomery Wards 1960s or 1970s model UHT-276C, made in Japan by Happy. It's power blue. It's an all or mostly metal machine that does zigzag stitch and some decorative stitches, selected with that lever on the top. The feed dogs drop for free-motion embroidery or free motion quilting. The case is original, but it's brown & tan, just as gauche with power blue as you could ask for, lol. I might have to put a Singer 404 (cream & tan) in that brown case and give the white case to the blue machine.
 

TackCollector

Familiar Face
Messages
72
Location
NW PA / NW OH
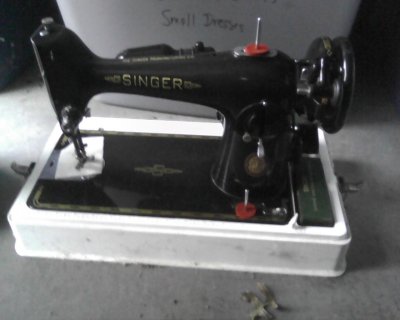
Photo12031526.jpg My Singer 201k -- Let me show you it. (in the white case)

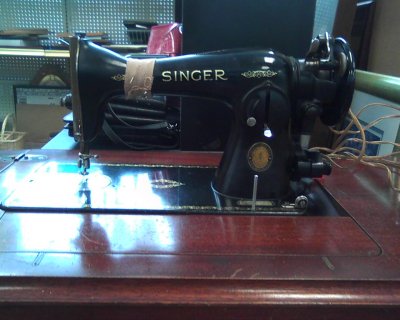
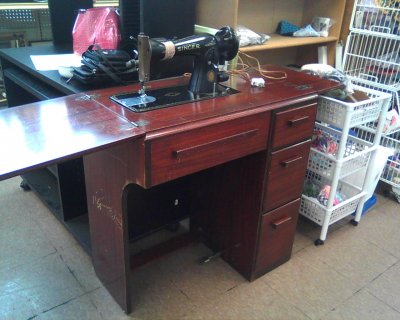
And the Singer 15-91 Centennial model w/ cabinet that I got for $10 at the local Salvation Army. I didn't need it, but when you go there with a pickup truck and an extra $10... stuff happens. LOL
Photo08301319.jpg Photo08301320.jpg
The cabinet drawers were all stuffed full of attachments and vintage sewing patterns and notions, too.
 

TackCollector

Familiar Face
Messages
72
Location
NW PA / NW OH
ATTACHMENTS: I posted this in a sewing thread in The Powder Room, but I'll repeat it here. The Singer low shank attachments fit a lot of Japanese and some of the current Brother machines. The old Whites, Kenmores, Japanese clone machines, etc. had the same or similar collections of attachments. If you can't find the exact manual for your machine, the attachments portions of the Singer manuals should work.

Using typical old sewing machine attachments, instructions from Singer online manuals:

I stumbled onto http://sewing-machines.blogspot.com/2008/08/singer-online-manuals.html yesterday, while looking for something else. The Singer machines like the 66 and the 15 series came with a whole box of attachments and the manuals covered how to use them. You can download an entire manual from the links on that blog site, or here I just linked to specific pages from one of the Smithsonian manuals that are available online.

The Singer 66 or Singer 15 manuals are good "generic" manuals to refer to if you can't find one for a Japanese-made straight stitch machine. The US Government gave the Singer model 15 design to Japan as part of the Marshall plan, and the Japanese improved upon it and subsequently added zigzag capability.
 

GHT

I'll Lock Up
Messages
9,793
Location
New Forest
My wife keeps a small collection of sewing machines. In the main they are all the ones that she has had from new, but she does have a few Singers from late 19thC to early 20thC. The models are a 10k, the 'K' means that it was made at Kilbowie on the Clyde in Scotland, a 15K in a treadle and two others, as yet, unknown. She's in the process of moving into her new sewing room, when that's done I will give you an update and photos of the machines.
 

vintageTink

One Too Many
Messages
1,321
Location
An Okie in SoCal
I have a White 656 Pink! I think her timing is off, she won't move unless I hand crank her first. The needle won't catch the bobbin, so I think the timing's off. I paid $20 for her and the corner sewing table.

177423_22Jun13_image4.jpg
 

TackCollector

Familiar Face
Messages
72
Location
NW PA / NW OH

Jeff Londerée

New in Town
Messages
10
Location
Austin
My wife and I recently restored my great grandmother's 1916 Singer 66. I haven't had much time to sew yet, but she seems to work pretty well despite being worked on by two mechanically-inept individuals. I do need to retighten the belt first, though.


By the way, Shangas, referring to the thread about your grandmother's machine was quite helpful during the restoration process.
 

vintageTink

One Too Many
Messages
1,321
Location
An Okie in SoCal

Shangas

I'll Lock Up
Messages
6,116
Location
Melbourne, Australia
By the way, Shangas, referring to the thread about your grandmother's machine was quite helpful during the restoration process.

You have a beautiful Singer 66 "Red Eye" as they're called. I'm glad my tutorial was helpful in fixing it up. They're really quite easy, these old machines. Tightening the belt should be very easy.
 

jskeen

One of the Regulars
Messages
120
Location
Houston
I don't claim to collect sewing machines, I just seem to accumulate them somehow. Like magic, or maybe they reproduce when nobody is looking. Anyway, I'm down to 5 now, a pair of singer 221 featherweights, one silver trim and one gold, an older singer 99 that was my Dad's Mom's machine, My other Grandma's main workhorse machine, a singer 401a slant needle, and a oddball industrial hemstitching machine, a singer 72w19 that she acquired from a neighbors estate many many years ago. I remember her teaching me how to use that monstrosity when I was a kid, and dressing up plain napkin sets with it. I have a couple of pics from last time I got it out and used it around here somewhere, let me see......
$T2eC16VHJI!E9qSO8)P7BRqQvSnhl!~~60_57.JPG

$T2eC16d,!yME9s5qIFu5BRqQv3SErw~~60_57.JPG


For those that might not know, hemstitching was originally a hand technique of removing threads along the edge of a piece of cloth, then stitching around a few threads along the line to leave a pattern of holes. It is very tedious and difficult, but was in high enough demand for fancy bed and table linens that several companies developed a machine to do it automatically. But the machines are themselves complicated and expensive, and were usually only found in production facilities.

The machine uses two needles, and two sets of top thread as well as two bobbins, and a pair of mechanical piercers that move down through the cloth, then spread apart as they move back up, while at the same time, the needles move down on each side to throw a stitch around the corners of the resulting hole, then moving the fabric forward to repeat. Needless to say, timing and setting the machines up is almost as tedious as doing the work by hand. But, once it was set up for a certain fabric, stitch and thread and working good, you could easily treat the edges of entire tablecloths, bedsheets and such in a matter of minutes, rather than days.

Modern machines to do the same thing are available, but hideously expensive. There is usually a pretty good demand for the antique's from either production facilities or boutique operators.
 
Last edited:

2jakes

I'll Lock Up
Messages
9,680
Location
Alamo Heights ☀️ Texas
I have hand crank Singer .
2uz42yv.jpg


I can't find the manual to show how to make adjustments.

This is the top of the stitch:
14m7se0.jpg


And this is the bottom stitch which is bunching up.
2iwakxz.jpg


Not sure where to adjust ...
357q0ib.jpg


On top full photo I have numbered #1 and #2 where I'm guessing I need
to make the adjustments or perhaps it's the tiny screw on the bobbin....
Thanks for any information !
 
Last edited:

Shangas

I'll Lock Up
Messages
6,116
Location
Melbourne, Australia
Leave the bobbin screws alone. They're not meant to be touched.

To adjust correct stitching and thread-tension, tighten or loosen the tension on the tension springs & wheel, as necessary (at point No. 1, in your photograph).

No. 2, is the stitch-length adjuster. Screw in, for larger stitches, screw OUT, for smaller stitches, if I remember correctly.

What you have there is a Singer 28 model. I have one at home, too. Threaded correctly, they sew pretty well.

You might want to also check the tension on the presser-foot (adjusted by that knob at the top of the machine-head). Heavier tension for thicker fabrics, to stop them moving and jerking around when the needle goes through, lighter tension for thinner fabrics, to stop them bunching up and snagging.
 

dmar836

New in Town
Messages
20
Location
Kansas City
2Jakes, any luck? I have never owned a shuttle machine but loops like what you show are often due to something other than simple tension adjustments. When that has happened to me, there is usually something misrouted or hanging up. I bet you could crank on the adjustment until it breaks the top thread and still have it loose underneath. Have you checked the needle size in relation to the thread?
Dave
 

2jakes

I'll Lock Up
Messages
9,680
Location
Alamo Heights ☀️ Texas
2Jakes, any luck? I have never owned a shuttle machine but loops like what you show are often due to something other than simple tension adjustments. When that has happened to me, there is usually something misrouted or hanging up. I bet you could crank on the adjustment until it breaks the top thread and still have it loose underneath. Have you checked the needle size in relation to the thread?
Dave

Hi Dave,

I made the mistake of tampering with the bobbin screws. Which Shangas pointed out that I should leave alone.

Luckily, I found out that there was an extra similar bobbin in the storage box & I replaced it.

The tension springs & wheel which I have labeled as #1 on the photo was my next step.

Not knowing whether to turn left or right to adjust stitching & thread-tension...I started by

turning to the right in small increments & stitching & checking. Then I adjusted to the left

& did the same until I could see a pattern of which was best & made note of this.

There was some improvement, but the problem is still there.


I recall now that on another machine, something similar was happening & changing the thread

I was able to fix it. I do know about the different sizes of needles for different projects...

but I didn't place too much thought on the size of the thread in relation to the needle size.

I have used this machine before & it produces excellent results. It may not

have all the fancy options , just straight stitching. But that's basically

all I need.

Regards,

Jake
 

Forum statistics

Threads
109,248
Messages
3,077,188
Members
54,183
Latest member
UrbanGraveDave
Top